
 Save
Save
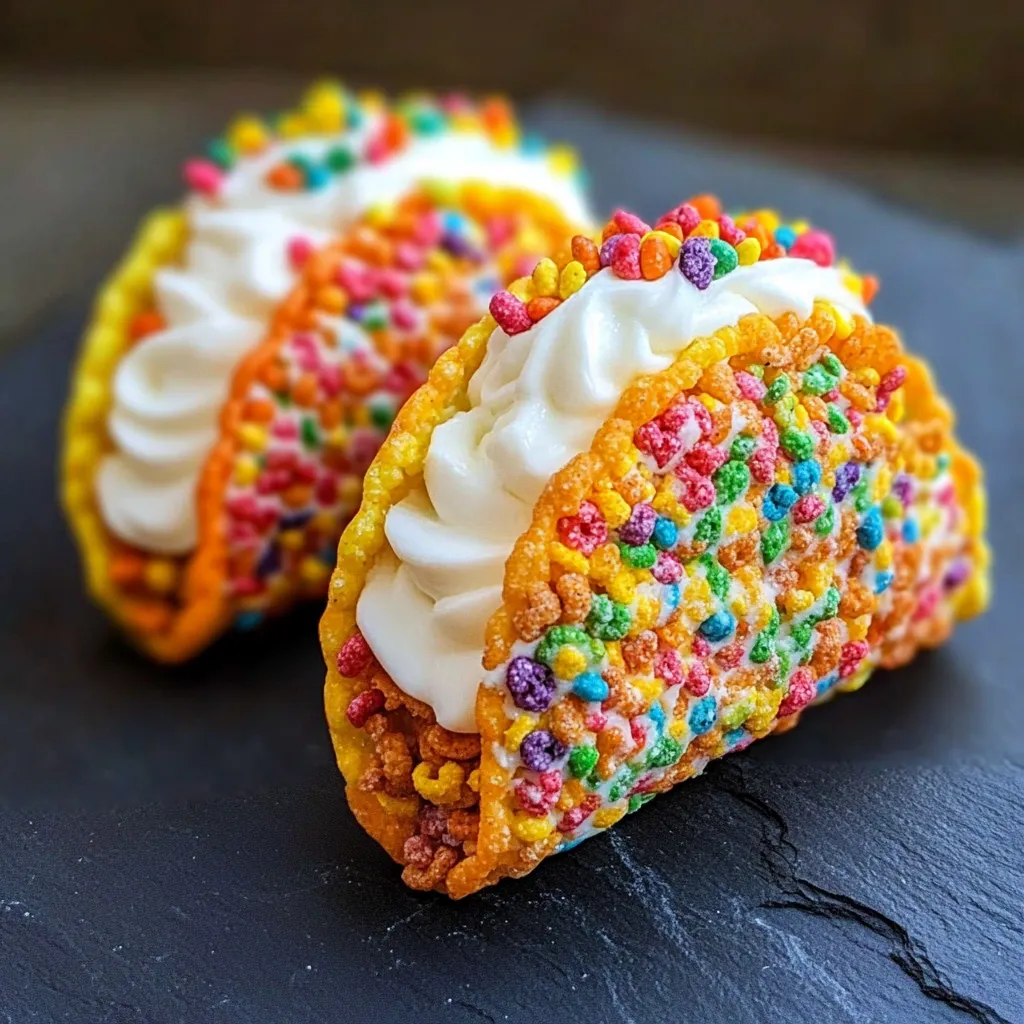
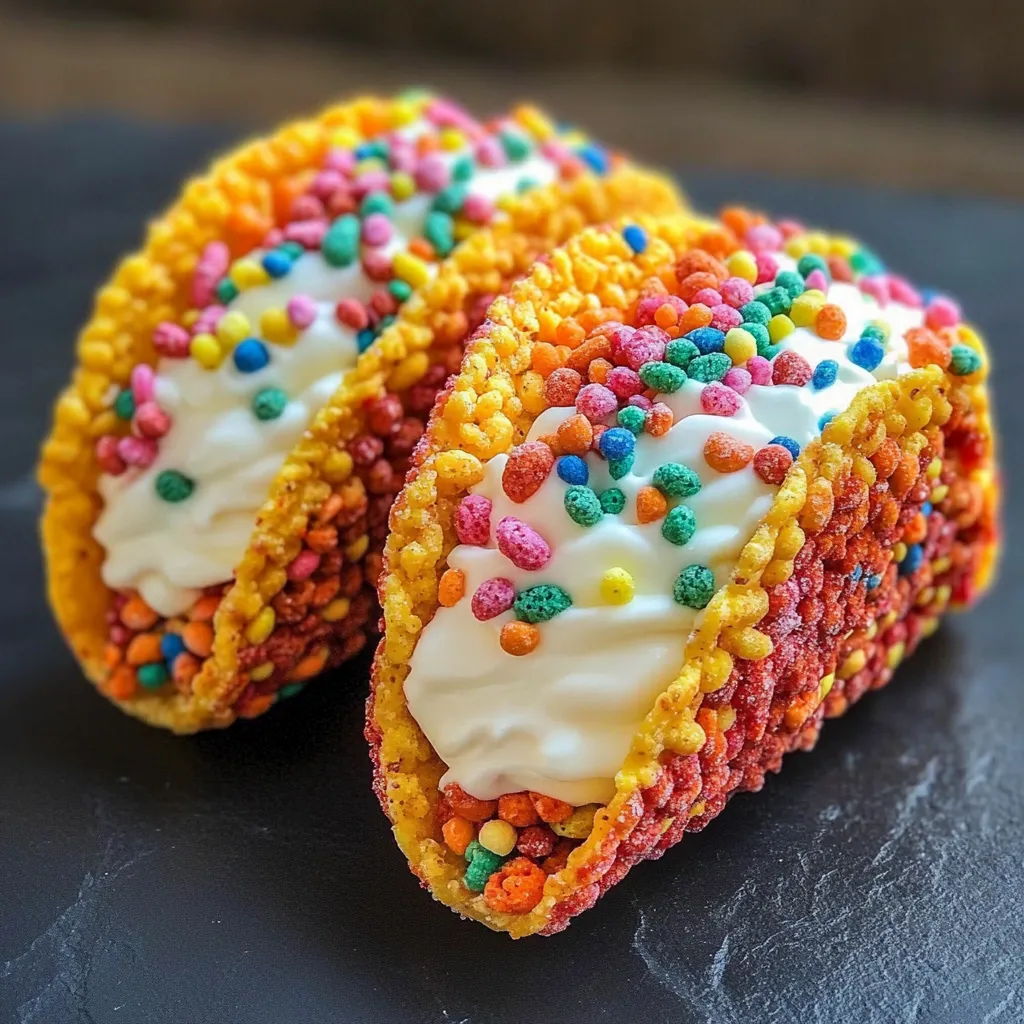
These whimsical dessert tacos transform childhood breakfast memories into an unforgettable treat that brings pure joy to any gathering. Crunchy, colorful cereal shells cradle smooth, vanilla-scented cheesecake filling that melts perfectly on your tongue, while extra cereal pieces add delightful pops of fruity flavor and satisfying texture. The playful presentation makes everyone smile before they even take their first bite, proving that sometimes the most creative desserts come from combining unexpected ingredients in surprising ways.
The first time I made these for a family barbecue, I wasn't sure how adults would react to such a playful dessert, but they disappeared faster than any traditional dessert I'd ever brought. My sister-in-law actually asked me to make them for her book club because she said they were the most fun dessert she'd ever seen. Now they're my secret weapon for any gathering where I want to create genuine excitement and joy.
Essential Components
- Fruity cereal: Choose your favorite colorful variety like Fruity Pebbles or Trix for the brightest, most vibrant shells
- Unsalted butter: Melted butter acts as the binding agent that holds the cereal shells together while adding richness
- Full-fat cream cheese: Room temperature cream cheese whips to perfect smoothness and provides the classic cheesecake base flavor
- Powdered sugar: Sifted sugar dissolves completely into the cream cheese, creating silky sweetness without grittiness
- Pure vanilla extract: High-quality vanilla enhances the cream cheese and complements the fruity cereal flavors beautifully
- Fresh whipped cream: Lightens the filling texture and adds airiness that balances the rich cream cheese perfectly
- Extra cereal pieces: Reserved for garnishing, these add visual appeal and textural contrast to the finished tacos
Detailed Assembly Process
- Shell Creation:
- Crush fruity cereal slightly in a large mixing bowl, leaving some larger pieces for texture while creating enough fine pieces to bind together. Pour melted butter over the cereal and stir thoroughly with a spatula until every colorful piece is evenly coated and glistening. The mixture should hold together when pressed but still maintain visible cereal pieces for the signature look.
- Mold Preparation:
- Press the buttered cereal mixture firmly into taco-shaped molds, mini muffin tins, or even improvised forms like small bowls to create shell shapes. Use clean hands or the back of a spoon to compact the mixture tightly, ensuring the shells will hold their shape when unmolded. Pay special attention to creating even thickness throughout for consistent results.
- Chilling Process:
- Refrigerate the pressed shells for at least thirty minutes, though longer chilling creates firmer, more stable shells that hold their filling better. The butter needs time to solidify completely, which transforms the loose cereal mixture into sturdy, handleable shells that won't crumble when filled.
- Filling Preparation:
- Beat softened cream cheese with a hand mixer until completely smooth and fluffy, scraping down bowl sides as needed to ensure even mixing. Gradually add sifted powdered sugar and vanilla extract, beating until the mixture is perfectly smooth without any lumps. The consistency should be light and spreadable.
- Whipped Cream Integration:
- Gently fold prepared whipped cream into the cream cheese mixture using a rubber spatula and careful folding motions that preserve the airiness. Avoid overmixing, which can deflate the whipped cream and create a dense filling instead of the desired light, fluffy texture.
- Final Assembly:
- Carefully remove chilled shells from their molds and arrange on serving plates. Spoon or pipe the cheesecake filling generously into each shell, creating attractive mounds that showcase the creamy texture. Top with additional cereal pieces for color, crunch, and visual appeal that ties the whole dessert together.
 Save
Save
These fun tacos have become my favorite way to create special moments without worrying too much about nutrition perfection. The individual portions help with moderation, and the joy they bring to family gatherings is worth its weight in gold. Sometimes the best treats are the ones that make everyone smile and create lasting memories around the table.
Creative Presentations
Arrange these colorful tacos on a bright serving platter with small bowls of extra toppings like mini chocolate chips, sprinkles, or fresh berries for a build-your-own dessert station. Create height variation by using different sized molds, or arrange them in a traditional taco holder for authentic presentation. For parties, consider making mini versions using smaller molds for bite-sized treats that are perfect for mingling.
Flavor Variations
Transform these tacos by using different cereal varieties like Cocoa Puffs for chocolate versions, or Lucky Charms for magical rainbow appeal. Add food coloring to the cream cheese filling to match or contrast with your chosen cereal colors. Flavor the filling with different extracts like strawberry, almond, or coconut for unique taste profiles. Fresh fruit pieces mixed into the filling add natural sweetness and interesting texture contrasts.
Storage Guidelines
These tacos are best enjoyed within a few hours of assembly to maintain optimal shell crispness and filling freshness. Store unfilled shells in airtight containers at room temperature for up to two days, though they're crispest when freshly made. The cream cheese filling can be prepared a day ahead and refrigerated, though it should be brought closer to room temperature before piping for easier handling.
 Save
Save
This recipe has taught me that some of the most memorable desserts come from embracing playfulness and creativity rather than following traditional rules. The combination of familiar flavors in an unexpected format creates genuine excitement that brings people together. Every time I make these, I'm reminded that food is about more than just nutrition - it's about creating joy, sparking conversations, and making ordinary moments feel special and memorable.
Recipe FAQs
- → How long do the cereal shells need to set?
- Chill the cereal shells for at least 30 minutes in the refrigerator until they feel completely firm to the touch.
- → Can I make these ahead of time?
- You can prepare components separately up to 2 days ahead, but assemble no more than 4 hours before serving for best texture.
- → What other cereals work for this recipe?
- Try Cocoa Pebbles for chocolate version, or Cinnamon Toast Crunch for a warm spiced flavor. Any colorful cereal works great.
- → How do I prevent the shells from breaking?
- Make sure to press the cereal mixture firmly and evenly when shaping, and let them chill completely before removing from molds.
- → Can I use store-bought whipped cream?
- Yes, store-bought whipped cream works perfectly. Just make sure it's the kind you can fold into other ingredients without deflating.