
 Save
Save
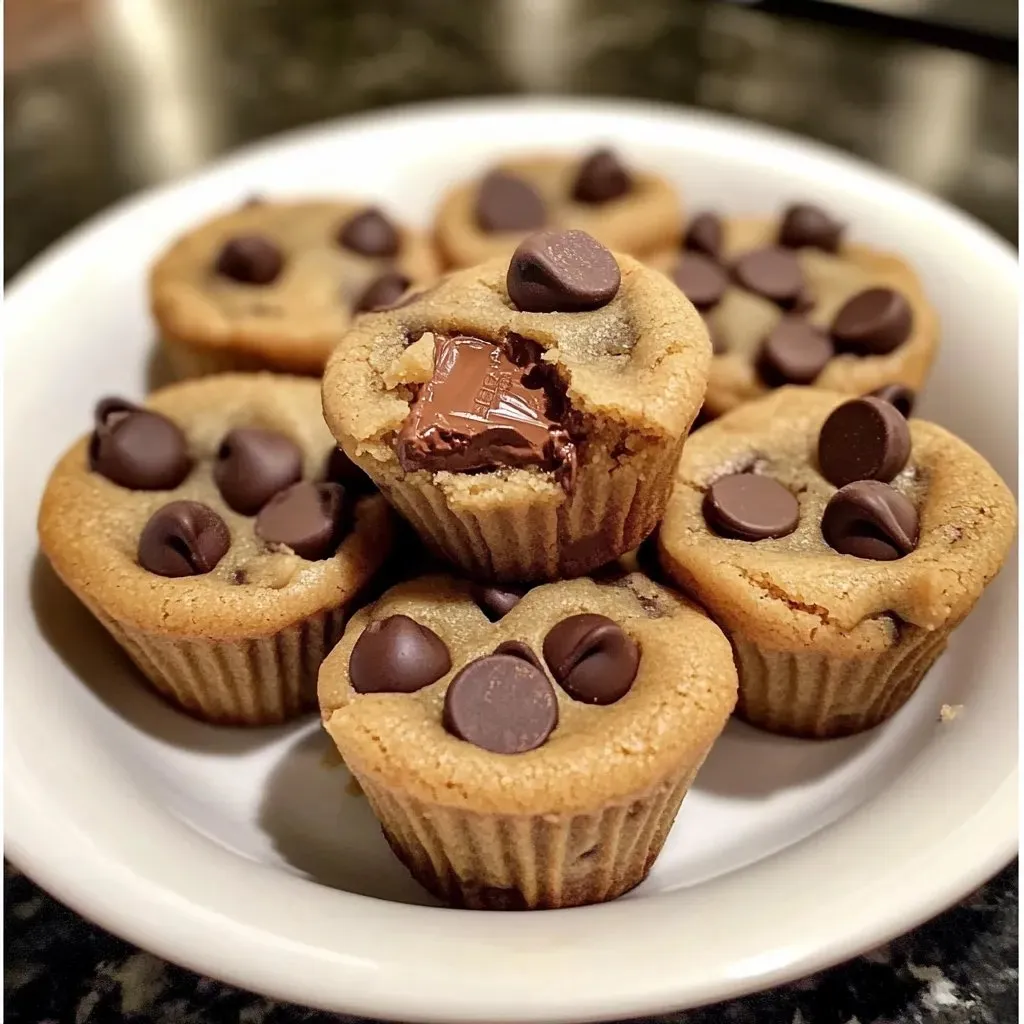
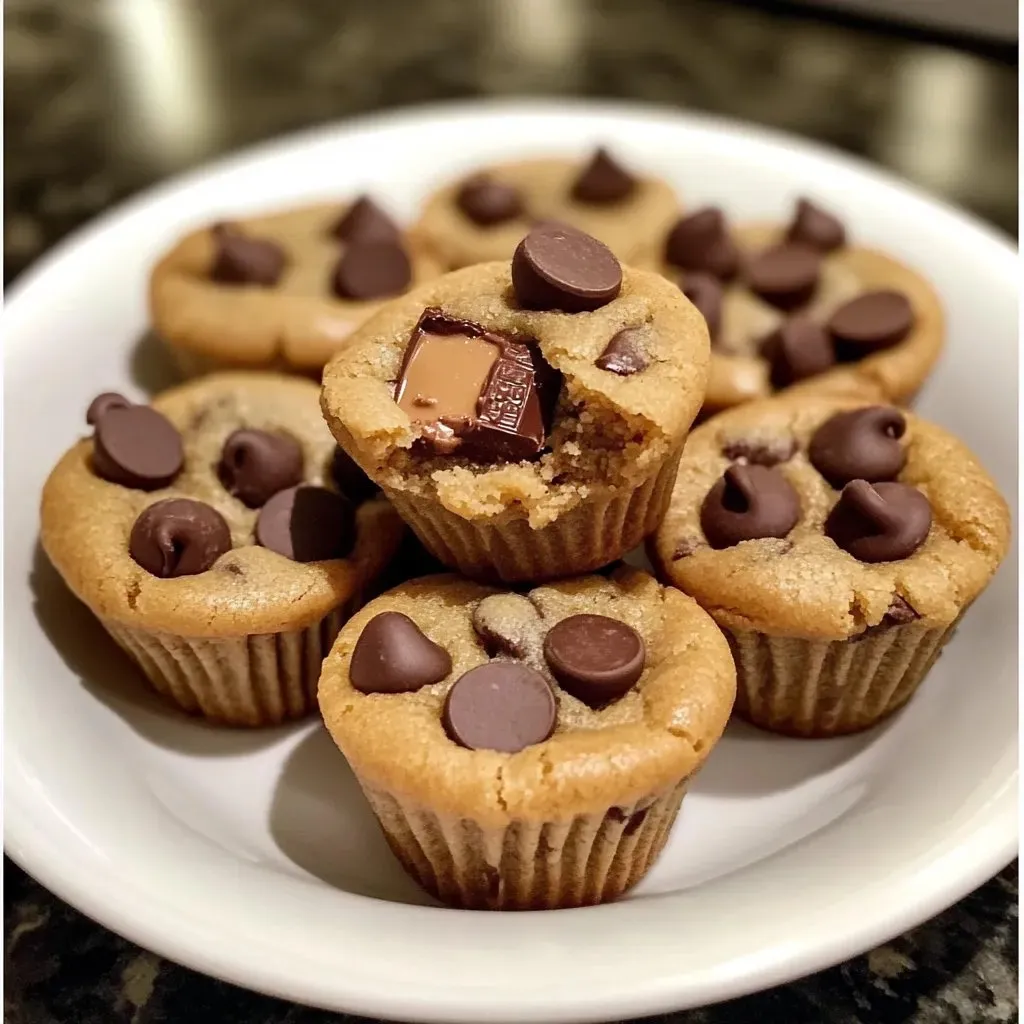
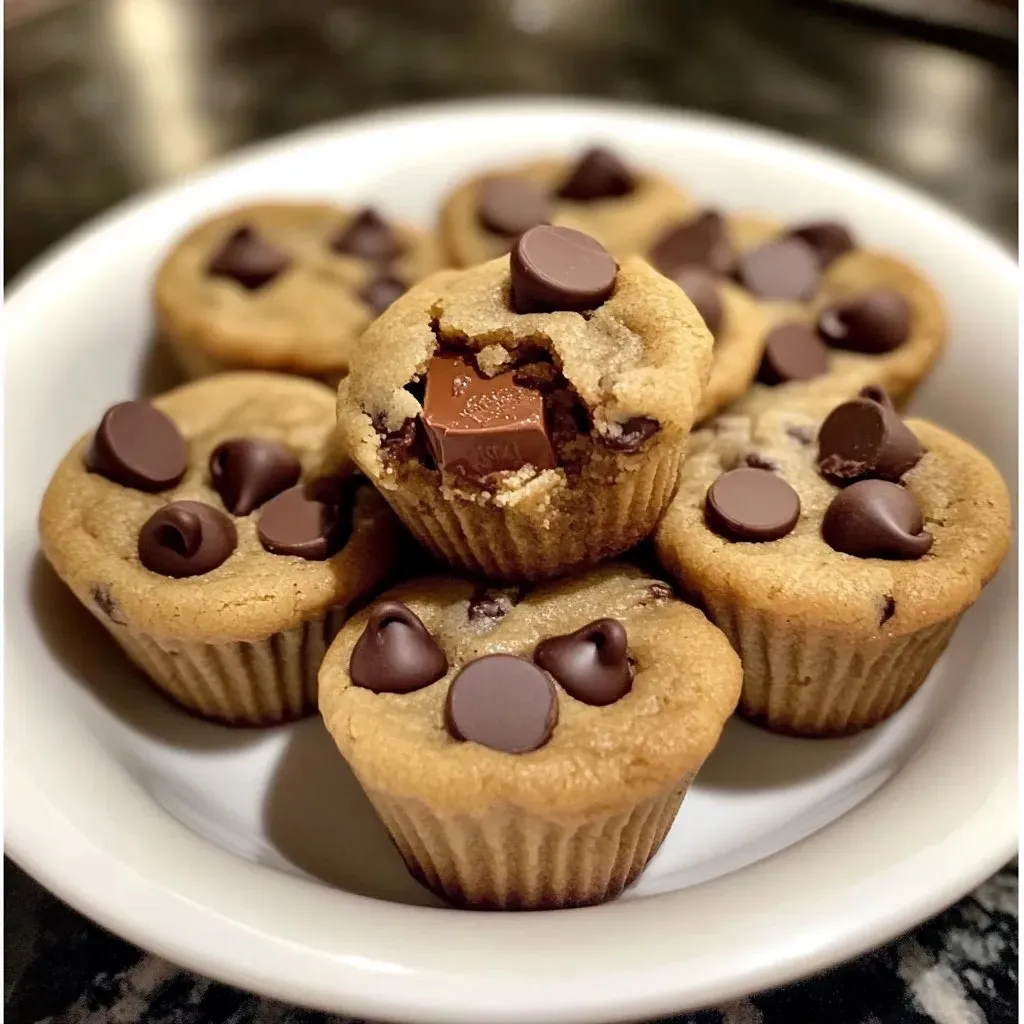
These irresistible little treasures combine the beloved flavors of peanut butter and chocolate in perfect bite-sized portions that deliver maximum satisfaction with minimal effort. Golden, buttery cookie cups cradle creamy peanut butter centers studded with melty chocolate chips, creating that magical contrast between tender cookie exterior and gooey, rich filling. Each morsel provides the perfect balance of sweet, salty, and chocolatey flavors that make these impossible to resist and ideal for any occasion when you want to impress without stress.
The first time I made these for a family gathering, I was looking for something more special than regular cookies but easier than elaborate desserts. The response was so enthusiastic that they immediately became my go-to contribution for every celebration. Now I find myself making double batches because they disappear so quickly, and I love watching people's faces light up when they discover that creamy peanut butter center hidden inside.
Essential Components
- Unsalted butter: Room temperature butter creates the tender, rich cookie base with unmatched flavor and texture
- Brown sugar: Provides moisture retention and subtle caramel notes that complement the peanut butter beautifully
- Granulated sugar: Ensures proper cookie texture and balanced sweetness throughout the dough
- Creamy peanut butter: Choose high-quality brands for the smoothest, most flavorful filling centers
- Powdered sugar: Stabilizes the peanut butter filling while adding sweetness without grittiness
- Semi-sweet chocolate chips: Mini chips work best for even distribution and perfect chocolate-to-bite ratio
- All-purpose flour: Forms the structure of the cookie cups while maintaining tender texture
- Fresh egg: Provides binding and richness while contributing to the golden color
- Pure vanilla extract: Enhances all other flavors with aromatic complexity and depth
Detailed Assembly Process
- Preparation Setup:
- Preheat your oven to 350 degrees Fahrenheit and line a standard muffin tin with paper liners for easy removal and clean presentation. This temperature ensures even baking without overcooking the delicate peanut butter centers.
- Cookie Base Creation:
- Cream softened butter with both brown and granulated sugars until the mixture becomes light, fluffy, and pale in color. This thorough creaming incorporates air that creates tender texture. Add egg and vanilla extract, beating until completely incorporated and smooth.
- Dough Development:
- Gradually add flour to the creamed mixture, mixing just until a soft dough forms without overworking. Overmixing develops gluten and creates tough cookies rather than the tender texture we want for these delicate bites.
- Filling Preparation:
- Beat creamy peanut butter with powdered sugar until completely smooth and well combined. Portion this mixture into small balls using a small cookie scoop or teaspoon, then chill briefly to make them easier to handle during assembly.
- Cup Formation:
- Press portions of cookie dough into the bottom and slightly up the sides of each muffin cup, creating shallow wells that will hold the peanut butter filling. Use slightly damp fingers to prevent sticking and ensure even distribution.
- Center Assembly:
- Place one chilled peanut butter ball in the center of each cookie cup, pressing gently to nestle it into the dough without flattening completely. The filling should sit slightly above the cookie base for optimal texture contrast.
- Chocolate Enhancement:
- Sprinkle mini chocolate chips generously over and around the peanut butter centers, pressing gently to help them adhere. The chocolate adds visual appeal and melty pockets of cocoa richness throughout each bite.
- Final Covering:
- Top each cup with a small amount of remaining cookie dough, partially covering the filling while leaving some peanut butter visible. This creates beautiful presentation while ensuring the filling stays moist during baking.
- Baking Process:
- Bake for 12-15 minutes until the edges become lightly golden brown but centers still appear slightly soft. The cookie cups should be set but not overbaked, which would create dry texture.
- Cooling Perfection:
- Allow cookie bites to cool in the muffin tin for 5 minutes before transferring to a wire rack. This brief resting period prevents breaking while ensuring proper texture development as they finish cooking from residual heat.
 Save
Save
These delightful bites have become my favorite way to satisfy sweet cravings without going overboard. The built-in portion control helps with moderation, while the familiar flavors provide genuine comfort and satisfaction. I love knowing that the peanut butter adds some protein and healthy fats, making these feel slightly less guilty than purely sugar-based treats.
Creative Presentations
Arrange these golden cookie bites on elegant platters for special occasions, or package them in decorative boxes for thoughtful homemade gifts. They look beautiful dusted with powdered sugar or drizzled with melted chocolate for extra elegance. For parties, consider making mini versions using mini muffin tins for even more delicate, pop-in-your-mouth treats.
Flavor Variations
Transform these treats by using different nut butters like almond or cashew for unique flavor profiles, or add crushed Reese's Pieces to the dough for extra color and crunch. Dark chocolate chips create more sophisticated flavors, while white chocolate chips offer sweeter contrast. For holidays, incorporate seasonal sprinkles or colored chocolate chips to match party themes.
Storage Solutions
Store these cookie bites in airtight containers at room temperature for up to one week, though they're best enjoyed within the first few days. For longer storage, freeze in single layers before transferring to freezer bags where they'll keep for up to three months. Bring frozen treats to room temperature before serving for optimal texture and flavor.
 Save
Save
This recipe has taught me that some of the most beloved treats come from combining familiar flavors in creative new formats. The transformation of classic peanut butter and chocolate into these elegant little bites proves that innovation doesn't require exotic ingredients - just creativity and attention to technique. Every time I make these, I'm reminded that the best homemade treats are the ones that bring genuine joy to both the baker and everyone lucky enough to taste them.
Recipe FAQs
- → Can I make these without eggs?
- Yes! The egg in the dough is optional. You'll still need the egg yolk wash for the golden tops, but you can skip it if needed.
- → How do I store these cookie bites?
- Store in an airtight container at room temperature for up to 5 days. They stay soft and chewy!
- → Can I freeze these for later?
- Absolutely! You can freeze the unbaked assembled cookie bites for up to 3 months. Bake straight from frozen, adding 2-3 extra minutes.
- → What if I don't have a muffin tin?
- You can make these as regular drop cookies on a baking sheet, just flatten the peanut butter balls and place them on top of cookie dough portions.
- → Can I use crunchy peanut butter instead?
- Creamy peanut butter works best for the smooth filling, but you can use crunchy if you prefer more texture in the center.