
 Save
Save
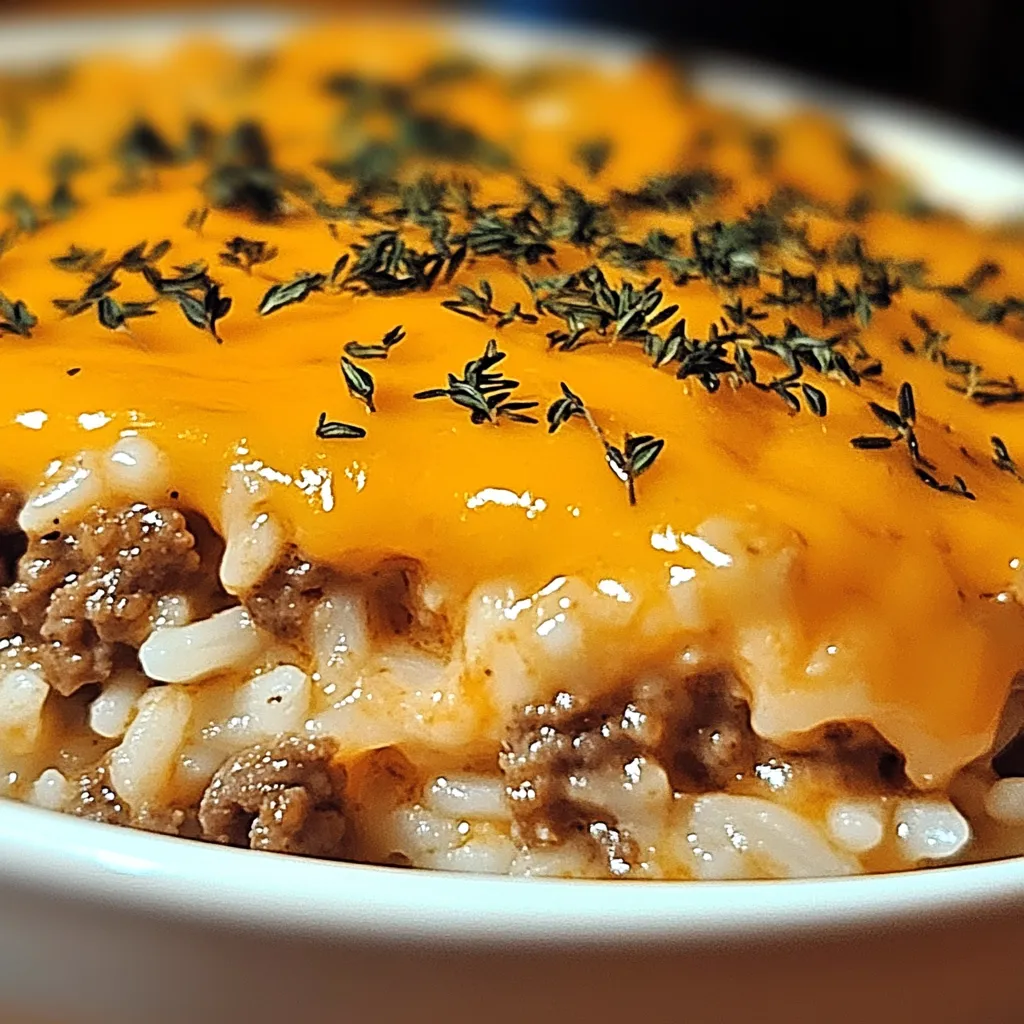
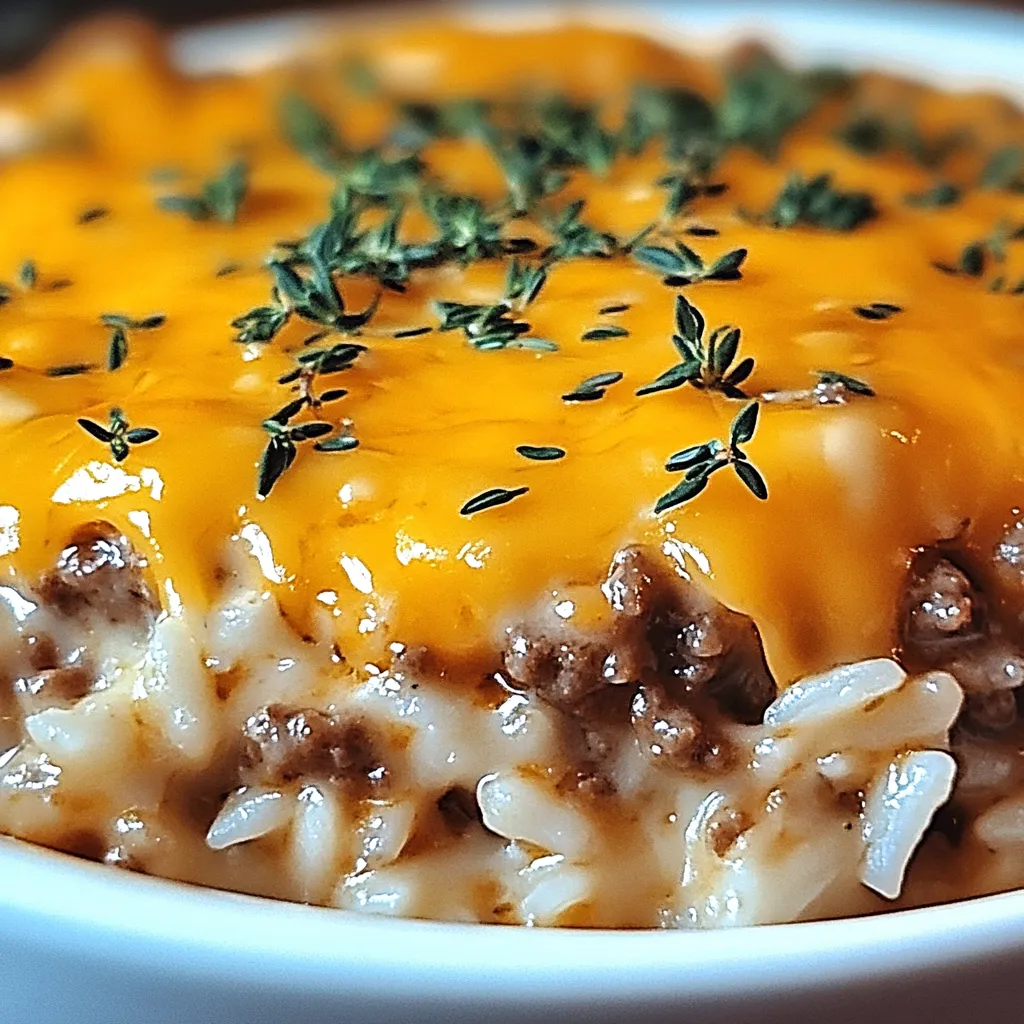
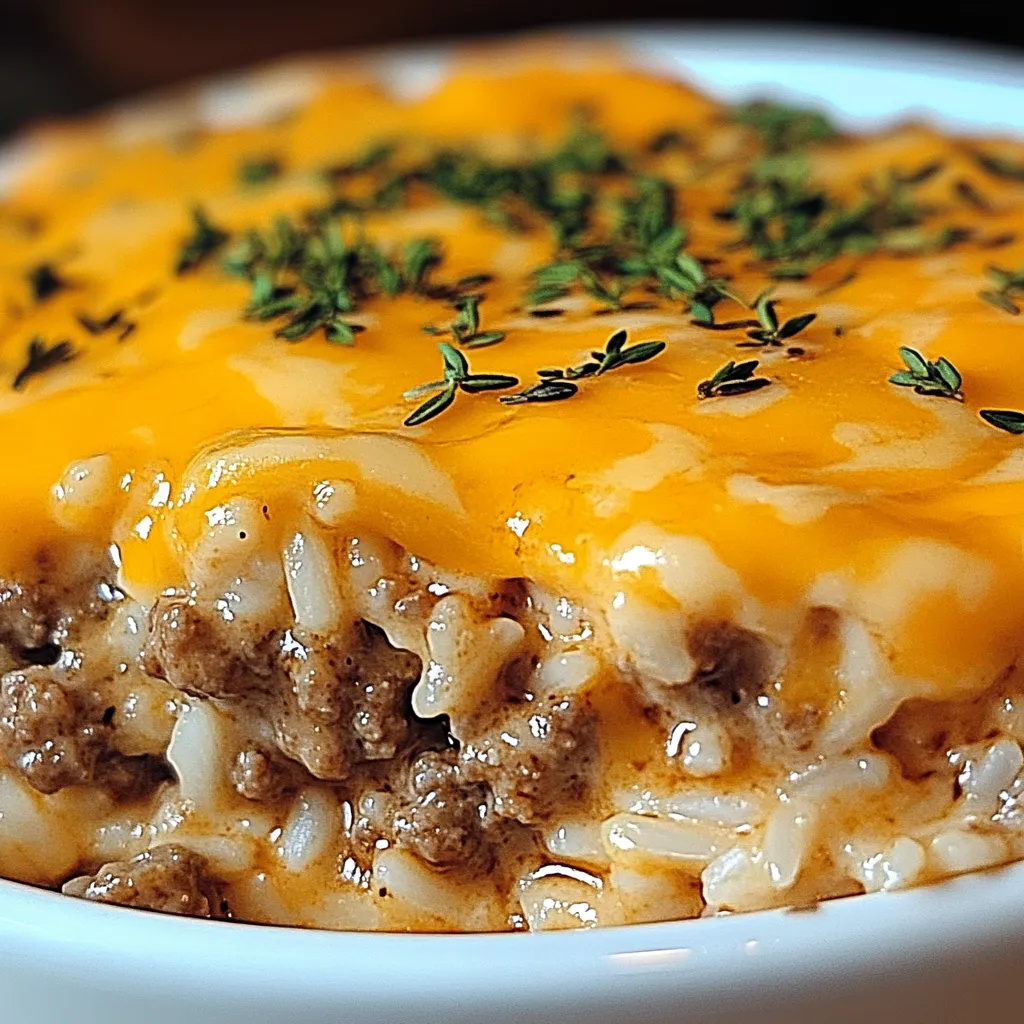
Melty cheddar creates a crunchy, sizzling layer atop flavorful ground beef and fluffy rice in this family-favorite dish. This filling meal transforms simple pantry staples into something truly memorable, striking the perfect balance between its velvety inside and crunchy top that'll fill you up and warm your heart even on your most chaotic evenings.
I whipped up this dish during one crazy week when I needed something filling that could last for several meals. What began as a simple fix for using up ground beef and extra rice has turned into my family's go-to comfort food. My kids specifically ask for it, and my husband never fails to grab another helping. There's something special about how the cheese gets all golden and crispy while keeping everything underneath creamy and rich—it's basic food turned into something absolutely fantastic.
Superior Ingredients Choice
- Lean Ground Beef: Makes a filling, protein-packed foundation with great taste without too much grease
- White Rice: Soaks up all the yummy flavors while adding just the right chewiness
- Yellow Onion: Brings sweet aromatics that get better as they cook with the meat
- Fresh Garlic: Spreads wonderful savory notes throughout the dish that boost all other tastes
- Beef Broth: Adds juicy, meaty goodness throughout while deepening the flavor
- Sharp Cheddar Cheese: Makes that famous crispy, golden top while adding tangy richness
- Sour Cream: Gives a velvety feel and slight tang that works against the savory bits
- Whole Milk: Gets everything to the perfect thickness while making it extra rich
- Paprika: Adds a hint of smoky warmth and pretty color to your finished meal
- Breadcrumbs: Give extra crunch and golden color to the cheesy topping
Building Your Tasty Dish
- Set Things Up:
- Heat your oven to 375°F while cooking your rice following the box instructions. Well-cooked rice makes the backbone of your casserole, giving it structure and soaking up all those tasty flavors as it bakes.
- Build Big Flavors:
- In a big pan over medium-high heat, cook ground beef with chopped onion and minced garlic until the meat isn't pink anymore and onions look see-through. This step is super important as it creates deep flavors through browning that'll spread throughout your whole dish.
- Mix The Creamy Stuff:
- Put the cooked rice and beef mix in a large bowl, then add beef broth, sour cream, milk, paprika, salt, and pepper. Stir everything really well so the creamy, savory sauce gets evenly mixed throughout.
- Put It Together:
- Pour everything into a greased 9×13-inch baking dish, spreading it out flat for even cooking. Getting it level creates the perfect base for the star of the show—that cheesy top.
- Make The Amazing Top:
- Scatter shredded sharp cheddar all over the surface, then if you want, sprinkle some breadcrumbs for extra crunch. This careful layering creates the best part of the casserole—a golden, crunchy top that's totally different from the soft middle.
- Bake Till Golden:
- Stick your assembled dish in the hot oven and bake for 25-30 minutes until the cheese melts completely, bubbles around the edges, and turns an irresistible golden-brown. The magic happens during baking when that awesome contrast between crunchy top and creamy inside develops.
- Let It Sit:
- Once it's out of the oven, wait just 5 minutes before serving. This quick rest helps the flavors settle and makes it easier to cut while keeping it hot enough to enjoy.
- Dish It Up:
- Cut into big portions, making sure everyone gets both the crispy top and creamy filling. The mix of textures and rich flavors makes a truly satisfying meal that feels like comfort on a plate.
 Save
Save
My crew especially craves this casserole during cold months when we want something warm and filling. I've noticed adding different veggie combos keeps things interesting—my boy loves when I throw in corn and bell peppers, while my daughter prefers mushrooms and peas. It's so easy to switch things up while still keeping that cheesy top everyone loves.
I first came up with this recipe when we needed to stretch our grocery budget during a tight financial month. What started as necessity has become our favorite tradition—showing that simple ingredients handled with care can make truly memorable meals that bring everyone running to the table.
Delicious Side Pairings
This filling casserole works great with sides that balance its richness. Try serving it with a simple green salad with tangy dressing to cut through all that creamy cheese. If you want a bigger meal, add some steamed or roasted veggies like broccoli or green beans that can soak up some of that yummy sauce. During winter, serve some warm crusty bread for wiping up any leftover cheesy goodness. When you have guests over, make it fancy by serving individual portions in small dishes with a tiny side salad for a dinner that's both impressive and comforting.
Tasty Twists
Switch up this flexible casserole by trying different flavor combinations while keeping that beloved cheesy top. Make a Tex-Mex version by mixing in black beans, corn, and chopped green chilies, then topping with a mix of cheddar and pepper jack. For an Italian take, add Italian seasoning and diced peppers to the beef, then use mozzarella and Parmesan for the crust. Health-conscious folks might like a lighter version using ground turkey, brown rice, and low-fat cheese that still tastes great. For something extra special, try a mushroom and Swiss version by cooking mushrooms with the beef and using Swiss cheese instead of cheddar.
Saving For Later
Get the most from this crowd-pleaser by storing it right. Put leftovers in the fridge within two hours in a sealed container for up to four days. When you want to eat it again, cover with foil and warm in a 350°F oven for 15-20 minutes until hot, taking the foil off at the end to make the top crispy again. For longer keeping, freeze single portions in freezer containers for up to three months. Thaw in the fridge overnight before heating for best results. If you're planning ahead, you can put the whole casserole together up to a day before, keep it covered in the fridge, and just bake when needed, adding 5-10 extra minutes to the cooking time.
I've brought this casserole to tons of family get-togethers, neighborhood potlucks, and even dropped it off to friends going through tough times. There's something about its down-to-earth nature that makes everyone love it—even people who usually don't like casseroles ask for this dish specifically. What really makes it special isn't any fancy ingredient or complicated technique, but how it brings folks together around the table. Seeing someone take their first bite and watching their face light up makes all the cooking worthwhile. This simple dish has taught me that sometimes the most meaningful food experiences come from basic ingredients treated with care and turned into something way better than you'd expect from the parts.
 Save
Save
Recipe FAQs
- → Can I prep it in advance?
- Absolutely! Assemble it up to baking, then cover and chill up to 24 hours. Add 5-10 extra covered baking minutes if it starts out cold.
- → What can go in place of panko?
- Swap in plain breadcrumbs, crushed crackers, cornflakes, or even fried onions. For gluten-free, try GF crumbs or ground rice cereal.
- → Does this freeze well?
- It does! Bake completely, cool, and wrap tight. Freeze up to 3 months. Thaw overnight in the fridge and reheat in the oven till hot.
- → Can I swap out regular rice for instant?
- Sure! Use 1 1/2 cups broth and a shorter bake time—about 15-20 minutes covered. The instant rice cooks faster and needs less liquid.
- → How do I check if it’s done baking?
- After baking covered, the rice should be soft and most liquid soaked up. If firm, cover again and bake 5-10 extra minutes. Then top with cheese.