
 Save
Save
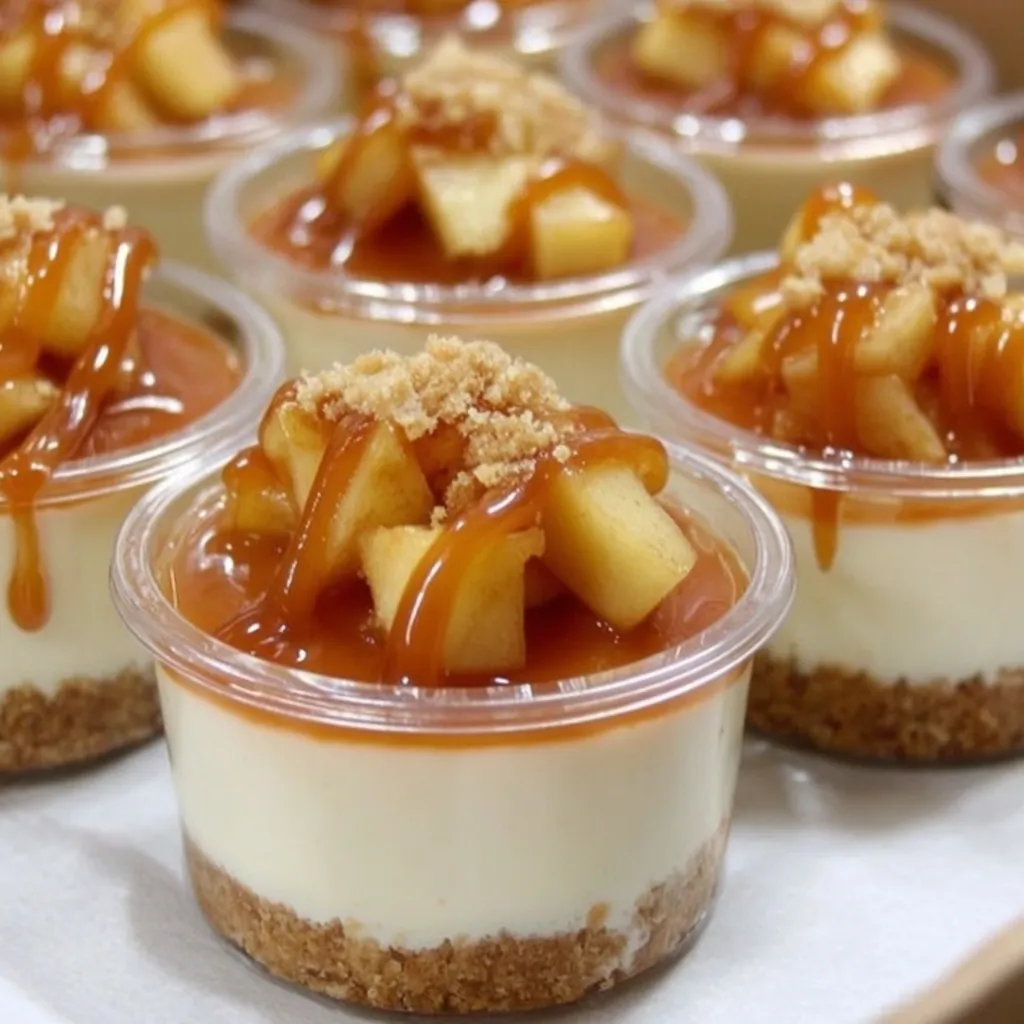
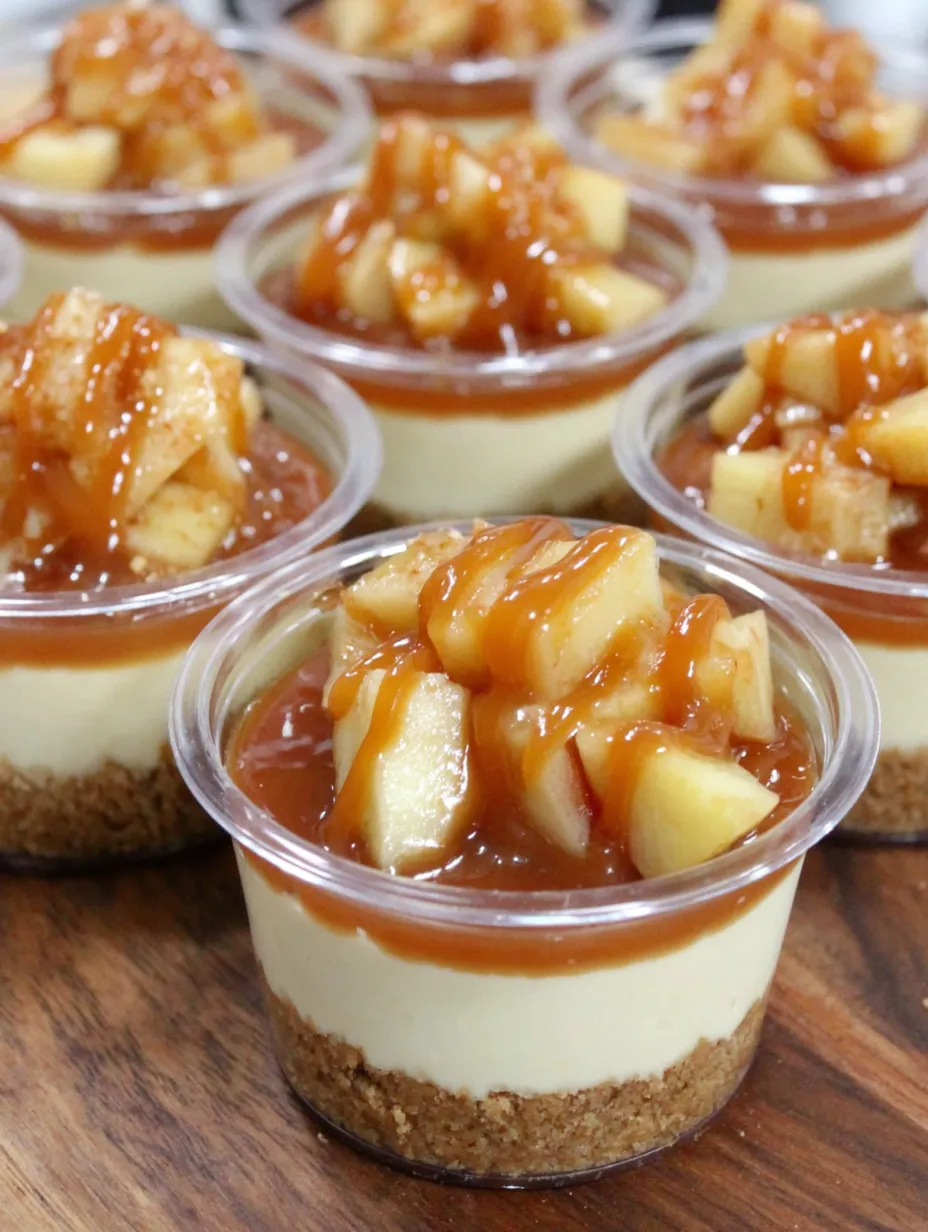
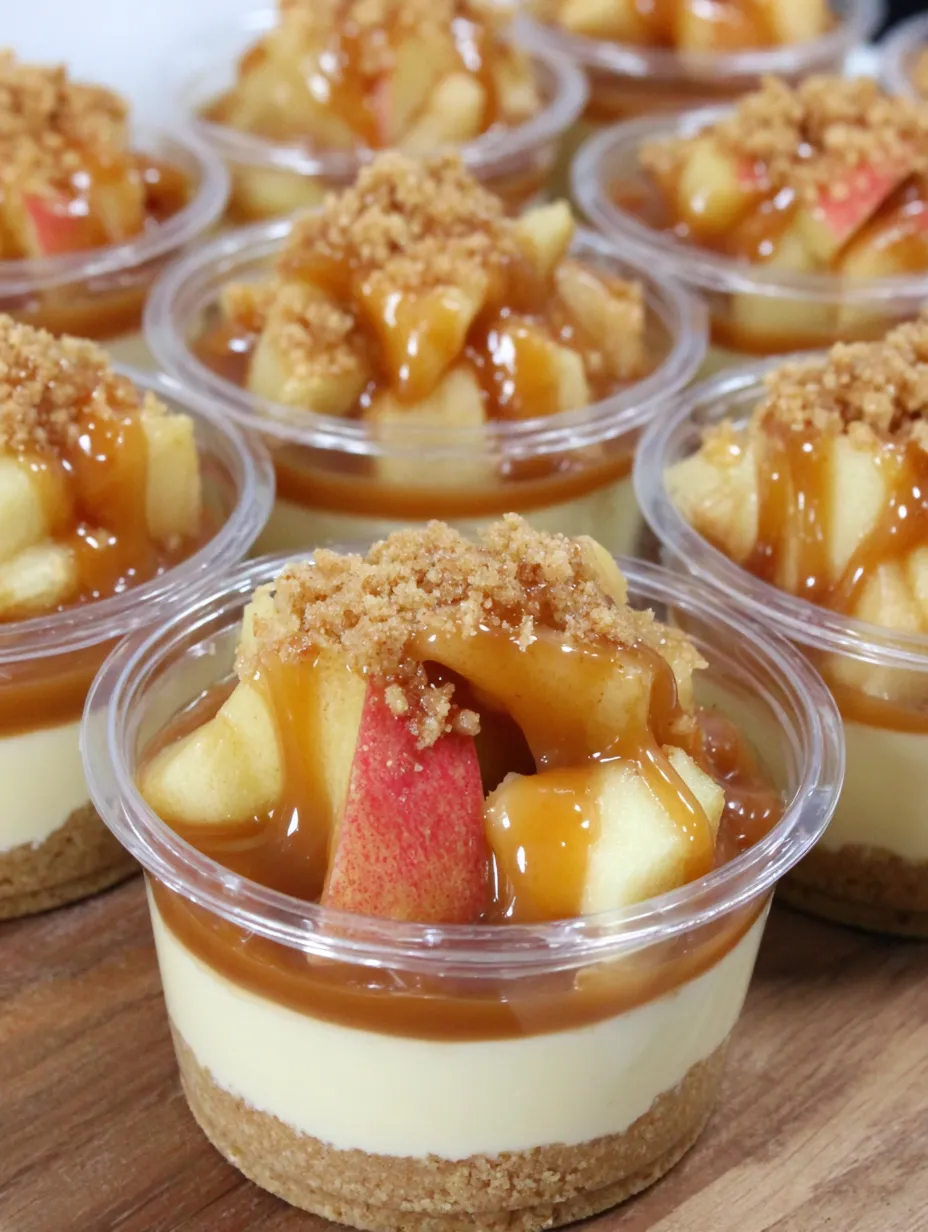
Caramel apple dessert cups combine everything you love about fall flavors in a clever little package that is easy to share and impossible to resist These cute cups are my favorite to bring to potlucks because everyone gets their own sweet treat with no mess or fuss
I first made these for a family hayride and kids and adults both loved them The combination of caramel and apples disappeared fast and now they are on my annual apple season checklist
Ingredients
- Apples diced and peeled: The fresher the apples the better Granny Smith or Honeycrisp add the perfect tartness
- Light brown sugar: Brings out the cozy caramelized flavor in the apples Choose moist brown sugar for best texture
- Cinnamon: This spice is essential for creating classic apple pie warmth Fresh cinnamon packs a bigger punch
- Vanilla wafer crumbs: Give a sweet buttery base Opt for high quality cookies for best flavor
- Butter melted: Helps hold the crust together and adds richness Use unsalted if you like more control over salt levels
- Instant vanilla pudding mix: Adds smooth creamy flavor Make sure to choose a good quality brand for best results
- Milk: Needed to make the pudding creamy and light Whole milk will give you the creamiest outcome
- Salted caramel sauce: Brings that irresistible salty sweet bonus You can use homemade or your favorite store bought brand
- Heavy cream: Whipped into the mousse for support and extra lusciousness Use very cold cream for best volume
- Extra caramel sauce for drizzling: This takes the presentation over the top Look for caramel with real dairy for best taste
Step-by-Step Instructions
- Prepare the Apples:
- Peel and chop the apples then place them in a saucepan with the brown sugar and cinnamon Cook over medium heat stirring now and then until apples soften and mixture thickens This usually takes about 8 minutes Cool the apples completely before assembling
- Make the Crust:
- In a mixing bowl mix vanilla wafer crumbs and melted butter Stir until the crumbs are well coated This will give you a sandy mixture that holds together when pressed
- Form the Base:
- Scoop the crumb mixture evenly into each of your plastic cups Press down with the back of a cup or a small glass to create a solid crust This step gives every bite a sturdy base
- Prepare the Pudding Layer:
- Whisk together the pudding mix and milk in a large bowl Allow it to chill for a few minutes until it thickens This helps the mousse hold its shape
- Add Caramel to Pudding:
- Pour in the salted caramel sauce and mix with an electric hand mixer on medium speed Blend until the caramel is incorporated and the mixture is smooth
- Whip the Cream In:
- Pour heavy cream into the pudding mixture and beat with the hand mixer for 3 to 5 minutes The mixture will become thick and mousse like Transfer to a piping bag for easy distribution
- Fill the Cups:
- Pipe the mousse mixture over the wafer crust in each cup Smooth or swirl the tops with a spoon for a pretty finish
- Top with Apples and Finish:
- Add a spoonful of cooled cinnamon apples over the mousse Drizzle a little more caramel sauce over the top to finish This gives each bite a punch of flavor
- Seal and Chill:
- Cover the cups with lids and chill until ready to serve These can be enjoyed right away but a few hours in the fridge helps the flavors blend together
 Save
Save
You Must Know
I always look forward to making these with my kids We pick our apples at a local orchard and the cinnamon caramel aroma fills our kitchen with the coziest fall vibes
Storage Tips
These dessert cups will stay fresh in the fridge for up to three days Keep them covered to prevent the apples and mousse from drying out For best presentation add the caramel drizzle just before serving
Ingredient Substitutions
Short on time Try using canned apple pie filling instead of making cinnamon apples Swap vanilla wafers for graham crackers or even Biscoff cookies for a different flavor You can also use homemade caramel for an extra special touch
Serving Suggestions
Serve these cups at potlucks birthday parties or holiday gatherings Their small size makes them ideal for buffets For a festive twist top with a dollop of whipped cream or a sprinkle of sea salt
 Save
Save
Cultural and Historical Context
Caramel apples are an iconic American treat that signal the start of autumn This dessert is inspired by those nostalgic flavors but transforms them into an easy make ahead delight perfect for sharing
Recipe FAQs
- → What apples work best for these dessert cups?
Firm, tart varieties like Granny Smith or Honeycrisp hold their shape and balance the sweetness well in this treat.
- → Can I use store-bought caramel sauce?
Yes, both homemade and store-bought caramel sauce work for the mousse and garnish, saving prep time if desired.
- → Is it possible to prepare these ahead of time?
Absolutely—the cups can be assembled up to two days in advance and stored in the refrigerator with lids on.
- → Are there substitutions for vanilla wafer crumbs?
Graham crackers or digestive biscuits make a tasty alternative for the crust if vanilla wafers aren't available.
- → How should I pipe the mousse into the cups?
Use a large piping bag or a zip-top bag with the corner snipped off to neatly layer the mousse over the crust.