
 Save
Save
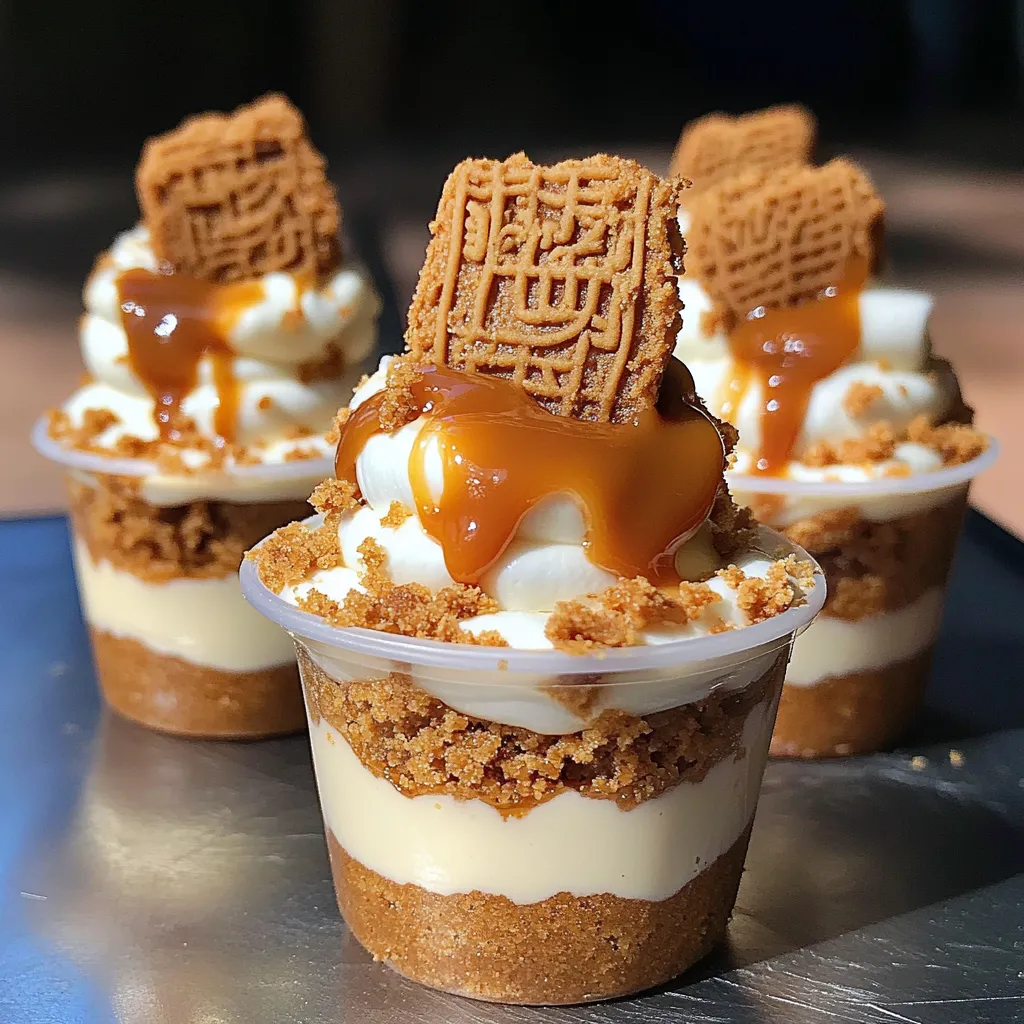
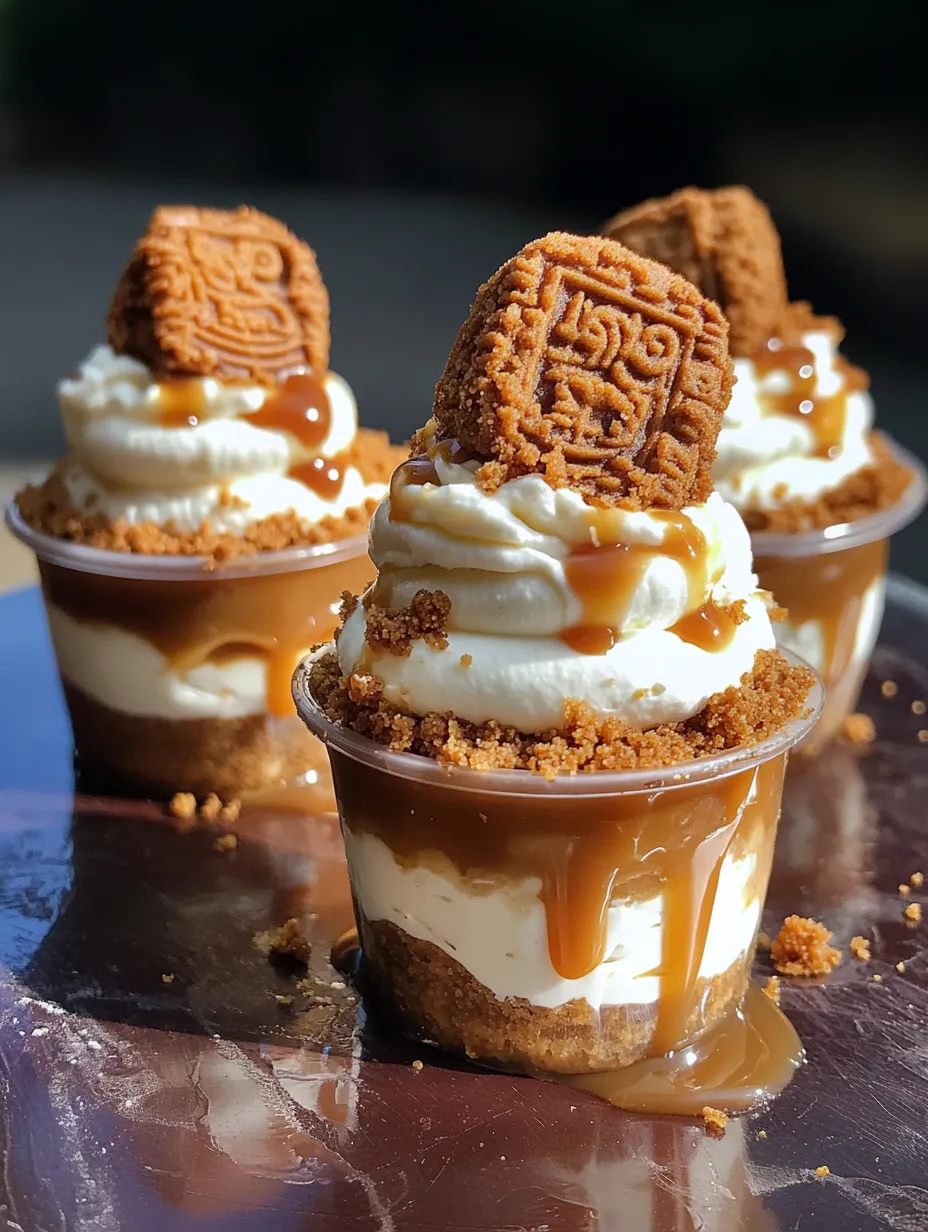
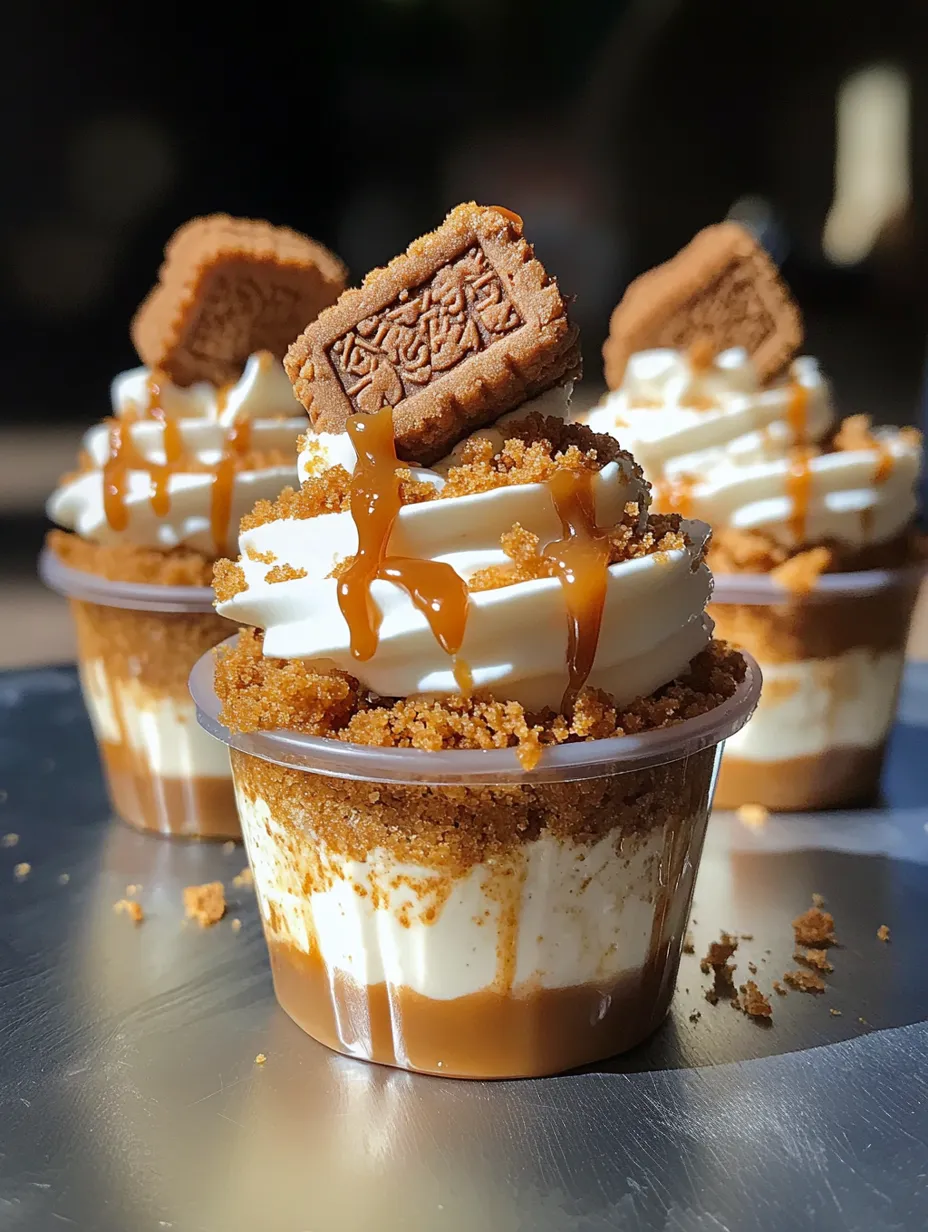
I whip up these no-bake cookie butter cheesecake cups whenever I'm hosting dinner or family's coming over. They're amazing - you get smooth, Biscoff-flavored cheesecake with crunchy cookie bits and a drizzle of sweet caramel all working together perfectly. I'm a huge fan of the individual portions too - no messy cutting or serving like you'd deal with when making a whole cheesecake.
The first batch I ever made vanished in seconds at my sister's birthday. My brother-in-law, who typically skips dessert, begged me for his own personal stash to take home! Now my family straight up asks for these cookie butter cups by name whenever I offer to bring something sweet.
Ideal Components
- Biscoff cookies: These tasty spiced shortbread bits create an amazing base and topping with their warm, caramel-like flavor. The hints of cinnamon really pop against the creamy filling.
- Cookie butter spread: This is what makes these cups special with its sweet, spiced taste. Grab Biscoff brand or any speculoos spread for the real deal flavor.
- Cream cheese: Brings that zippy tang that cuts through sweetness in the mix. Don't skimp - always go full-fat for the smoothest results.
- Heavy whipping cream: When you whip it up, it adds a cloud-like quality to the filling, making it lighter than normal cheesecake but still totally indulgent.
- Caramel sauce: Adds a rich sweetness that really brings out the cookie butter flavors. Grab a jar from the store to save time or make your own for something extra fancy.
 Save
Save
Detailed Method
- Build your foundation
- Start by smashing Biscoff cookies into tiny bits. Mix with melted butter until it looks like damp sand. Push this mixture down firmly into each cup, making an even layer about 1/4 inch thick. Try using a measuring spoon's back to pack it down tight so it won't fall apart when you serve it.
- Blend the smooth center
- Make sure your cream cheese sits out until it's room temp for the best results. Beat it until it's super smooth, then add your cookie butter and powdered sugar. Keep mixing until you can't see any lumps and everything feels silky between your fingers. You want it creamy enough to spread but firm enough to hold shape.
- Add some fluff
- Getting that perfect airy texture is all about adding air. In another bowl that's nice and cold, whip your chilled heavy cream until soft peaks start to form. Then carefully fold this into your cookie butter mix with a rubber spatula. Use gentle down-and-over movements instead of stirring to keep all that lovely air trapped inside.
- Stack it nicely
- Making it look good matters for both eyes and taste buds. First goes the cookie base, then pipe or spoon about 2 tablespoons of your cheesecake mix on top. Add some caramel drizzle, sprinkle with cookie bits, then do another layer of filling. This creates pretty sections that show off each part when you dig in.
- Top it off
- Make these cups look extra special with simple touches. Add a swirl of whipped cream, sprinkle more cookie crumbs, and stick a mini Biscoff cookie standing up in each one. For that wow factor, add one last drizzle of caramel right before serving so it runs down the sides in pretty streaks.
- Let it rest
- Don't rush this part. Put your finished cups in the fridge for at least 2 hours, though overnight works even better. This waiting time lets all the flavors mix together and helps everything firm up just right so each spoonful holds its shape when you dig in.
When I first tried making these, I thought I'd save some calories with light cream cheese. What a mess! The filling stayed too soft and missed that wonderful rich feeling that makes these so good. My family actually likes these little cups better than a big cheesecake because you get the perfect amount of crust and filling in every bite. They're super handy for outdoor gatherings too!
Display Suggestions
These little cheesecake cups can be the star of any dessert spread. Try arranging them on a stand with different levels and put tiny spoons next to each one for easy eating. For a casual get-together, just place them on a wooden board with some fresh berries scattered around for a pop of color. During holidays, top them with colored sprinkles or edible sparkles that match the season. I once brought these to a baby shower with tiny blue flags stuck in the top saying "It's a Boy" and they were a huge hit.
Taste Variations
You can switch up these treats with all kinds of add-ins based on what you like. For chocolate lovers, throw some mini chocolate chips into the filling and use chocolate sauce instead of caramel. In fall, try adding a dash of pumpkin pie spice to the mix for a seasonal touch. If you're just serving grown-ups, a splash of Baileys or Kahlúa mixed into the cream cheese gives it a grown-up kick. For a fruity twist, add a layer of raspberry jam between the cheesecake layers to cut through the richness.
Keeping Fresh
Your cheesecake cups will stay tasty and firm when stored right. Keep them covered in the fridge and they'll last up to 5 days, though they're really best eaten within the first 3 days. If you need to work ahead, make the base and filling separately and put them together just a day before your event. When taking them to parties or picnics, carry them in a cooler with ice packs, and save the final toppings for right before you serve them so they look their best.
 Save
Save
I've been bringing these cookie butter cheesecake cups to practically every gathering for the last couple years, and they always wow everyone. There's just something special about mixing spiced cookies, smooth cheesecake, and rich caramel that almost everybody loves. My favorite thing is how easy they are to make even though they look so fancy. Since you don't need to bake them, they're perfect for hot days or when your oven's busy cooking other stuff. While you do need to wait for them to set up properly, the actual hands-on work is pretty quick, making them great for both planned parties and last-minute get-togethers.
Recipe FAQs
- → What exactly is cookie butter?
- It’s a creamy spread made by blending spiced cookies like Biscoff or Speculoos. Think of peanut butter, but sweet, smooth, and with a cinnamon twist.
- → Can I prep these ahead of time?
- Absolutely! Put them together up to three days early. Keep them chilled, then add toppings like whipped cream just before serving.
- → What if I don’t have dessert cups?
- You could use mason jars, wine glasses, champagne flutes, or even clear plastic cups. Anything see-through lets the layers shine!
- → Will these freeze well?
- Yes, they freeze great for about a month. Just let them thaw slowly in the fridge overnight and add fresh toppings later.
- → What’s a good swap for cookie butter?
- Peanut butter works, or even Nutella or dulce de leche. The flavor will change a bit, but they’re all tasty alternatives.