
 Save
Save
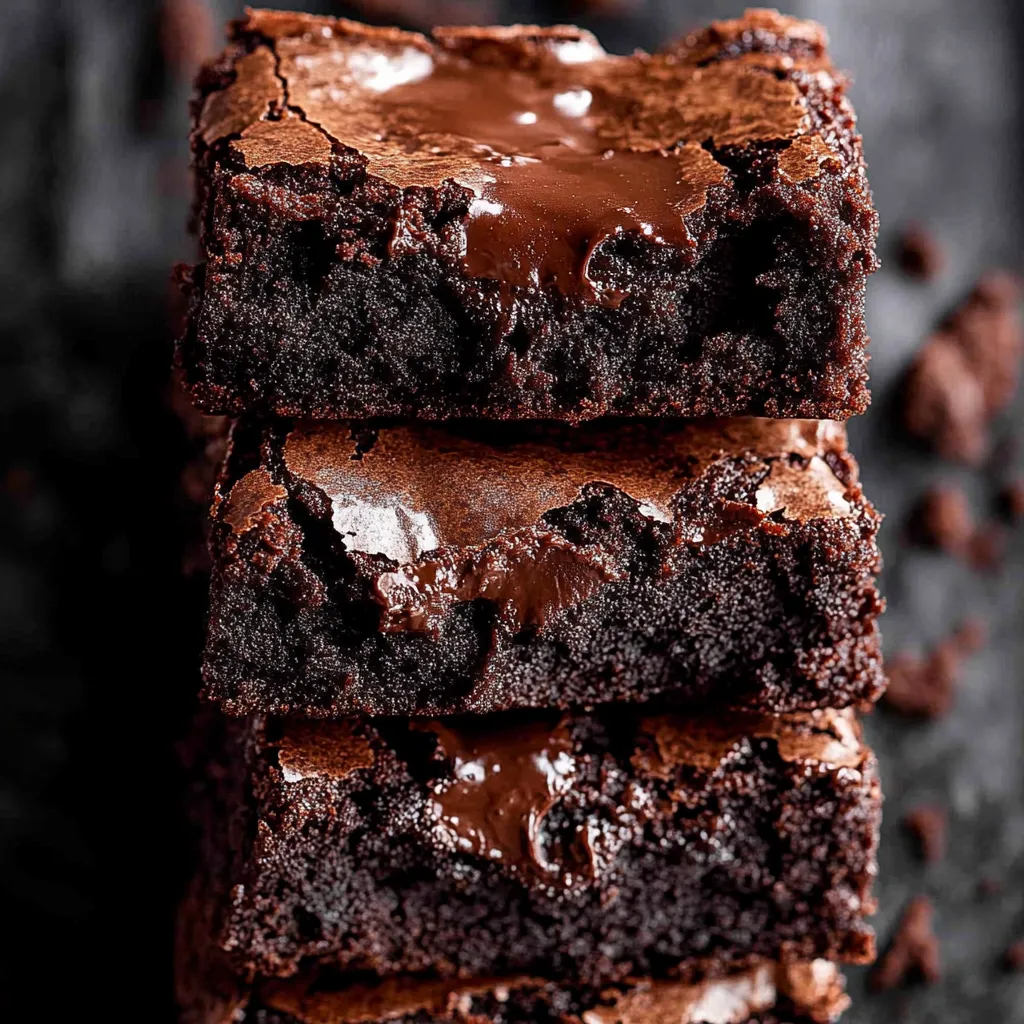
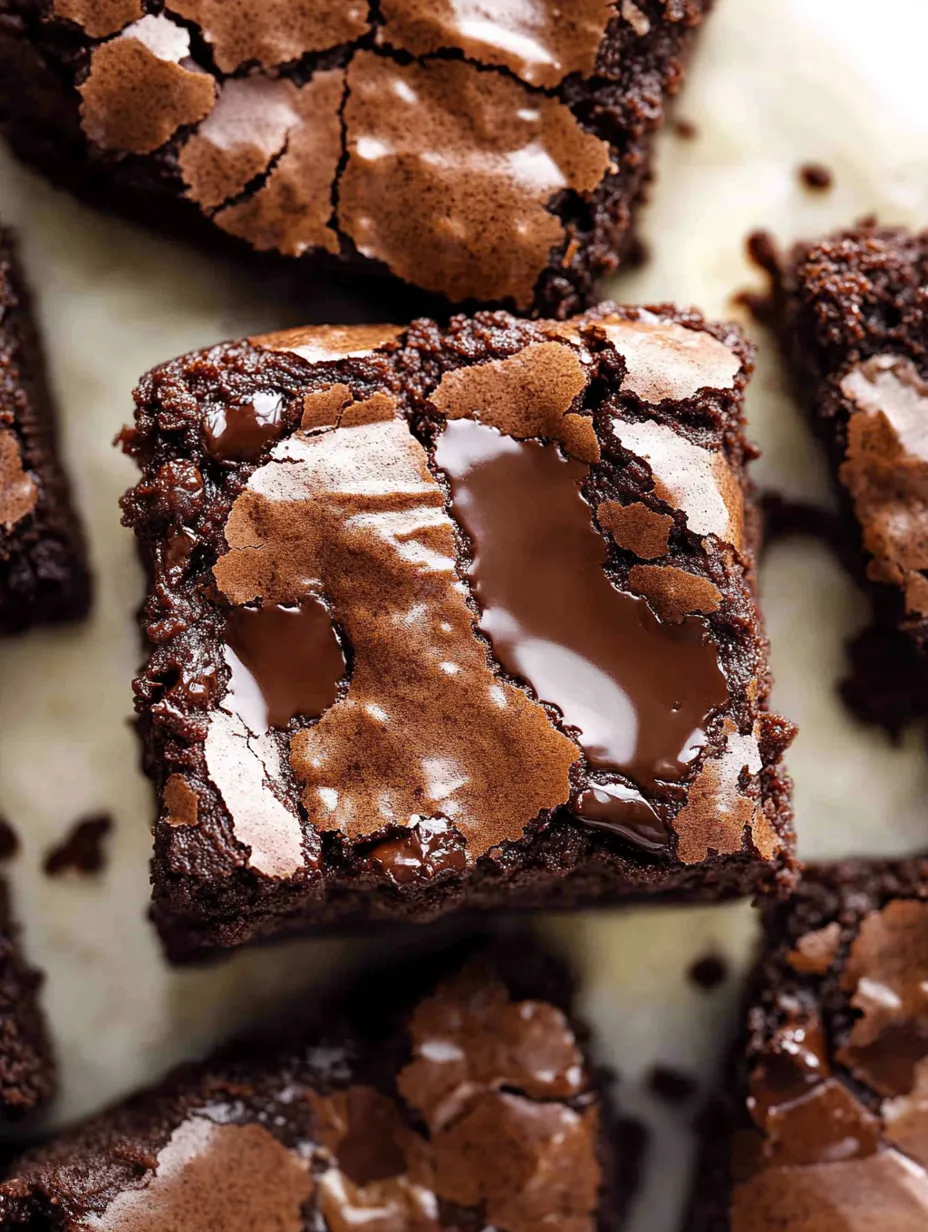
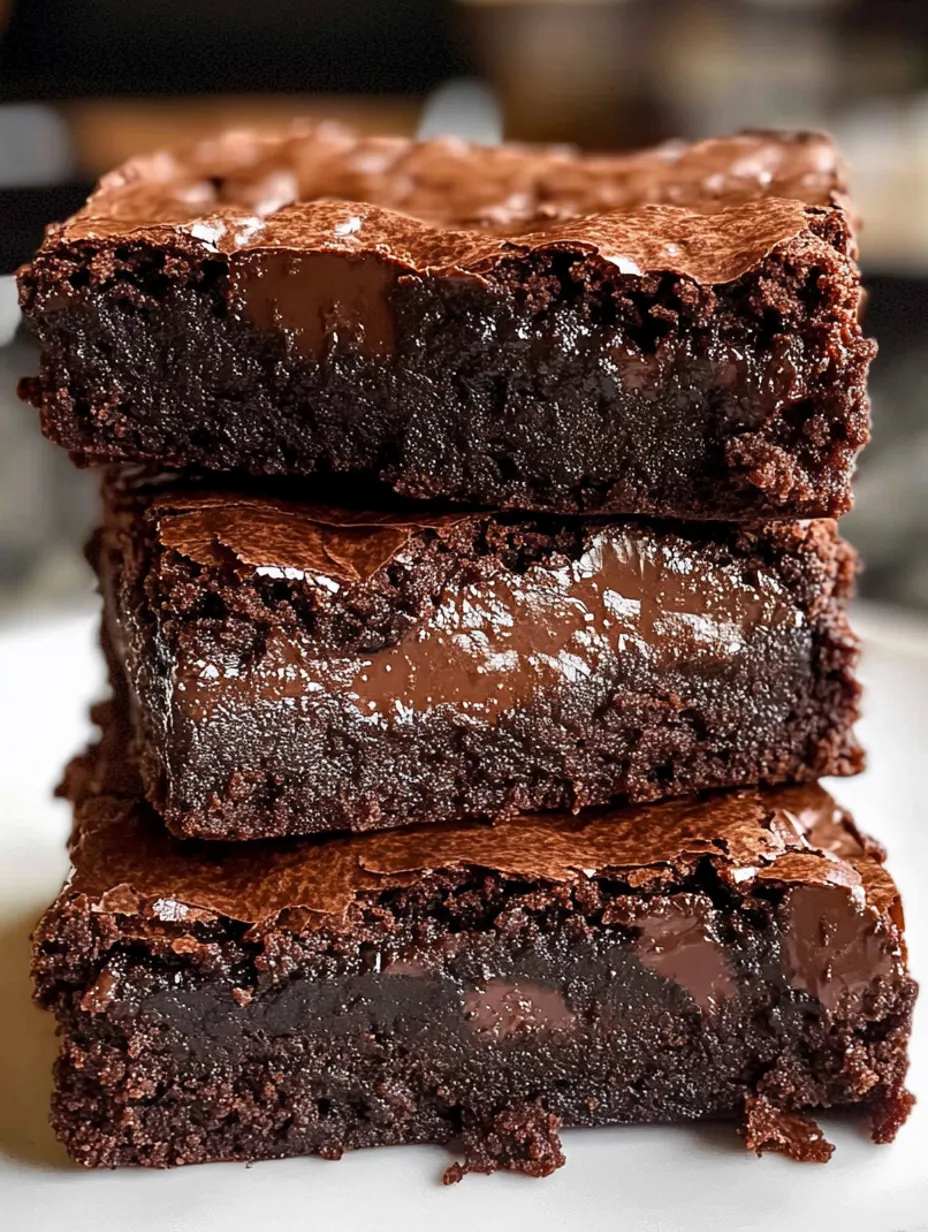
I'll never forget when these brownies completely changed my baking game forever. It was pouring outside on a Sunday, and my kid had brought the whole soccer squad over after their game. I had just half an hour to whip up something that would wow a pack of teenagers with super high standards. Out of options, I gambled on this simple brownie recipe that claimed to be quick and amazing. When I took that tray out, the chocolate smell was so strong that kids showed up in my kitchen before I'd even checked if they were done. That first taste – the crisp, crackling surface breaking into a gooey middle filled with melted chocolate bits – stopped kids mid-sentence. These brownies have become my go-to treat, asked for at everything from school fundraisers to family parties, and now I'm letting you in on my secret.
When I shared these at my neighbor's get-together, her husband sent me a text at midnight asking if there were any extras he could "steal." I'm not completely sure if he was kidding about jumping our fence to raid our kitchen. These brownies make people that crazy.
Key Ingredient Magic
- Cocoa Powder (Unsweetened) - The foundation of our chocolate taste. Dutch-processed gives deeper color and smoother flavor, but regular works great too. Just make sure it's not old – stale cocoa tastes boring.
- Butter - I go for unsalted so I can pick how much salt goes in, but if you've got salted, just cut back on the added salt a bit. And trust me, melted butter is key for that gooey texture.
- Vegetable Oil - This might look weird next to butter, but this tiny bit of oil helps create that crackly top everyone fights for. Don't leave it out!
- White and Brown Sugar - You need both kinds. White sugar makes the crackly top, while brown adds moisture and richness. I've tried tons of different amounts and this mix is just right.
- Eggs - They give structure and richness. Room temp eggs mix better, but if you forgot, just put them in warm water for 5 minutes.
- Vanilla Extract - Try to use real vanilla. It seems small but it really fills out the chocolate flavor.
- Flour - Just enough to hold things together without making cakey brownies. Measuring right is super important – too much flour is why most brownies turn out dry.
- Chocolate Chunks - Pick a chocolate you'd happily eat by itself. I like bittersweet (around 70% cacao) for rich flavor, but semisweet is great too. Breaking up a bar instead of using chips makes those awesome melty spots.
 Save
Save
Can't-Fail Approach
Starting RightFirst things first, heat your oven to 350°F (175°C) and put parchment in your pan. Leave paper hanging over the edges – these flaps will help you lift the brownies out easily. I use an 8×12-inch pan for the right thickness, but 8×8 works for thicker brownies (just bake them a few minutes longer).
Mix It SmartIn your bowl, stir together melted butter and oil first, then mix in both sugars until they're well combined. This sets up the base for that crackly top. Drop in eggs and vanilla, then whisk hard for a full minute – you're not just mixing, you're adding air, which matters for getting the texture right.
Add Dry Stuff CarefullyNow for the dry stuff. Sift your flour, cocoa powder, and salt right into the wet mix. This stops lumps without needing another bowl. Use a rubber spatula to fold everything together with light moves, just until you can't see dry spots anymore. Too much mixing wakes up the gluten in flour, which can make brownies tough instead of soft.
Chocolate LoadingMix in most of the chocolate chunks, saving a handful for the top. This two-step approach makes sure you get melty chocolate all through the brownies plus pretty chocolate pools on top that look amazing.
Smart BakingPour your mix into the ready pan and smooth it out. Don't tap the pan to get air bubbles out – we want to keep those for the right texture. Sprinkle your saved chocolate chunks on top, pushing them in just a little.
Watch Your TimingBake for 25-30 minutes if you want that amazing fudgy middle that makes these brownies so special. The center shouldn't wobble but should still look slightly wet. A toothpick stuck in will come out with sticky crumbs, not totally clean. Remember, brownies keep cooking from leftover heat after you take them out.
Wait For The WinThis part's the hardest: let the brownies sit in the pan for 15-20 minutes before moving them to a cooling rack. They need this time to firm up properly. For neat cuts, wait until they're fully cool, though I won't blame you if you dig in while they're warm (just be ready for the delicious mess).
My daughter's buddy Madison, who calls herself a "brownie expert" at 13, gave these her highest score ever and asked if I'd make them for her birthday instead of cake. I took it as the best compliment ever.
Tasty Companions
Turn these brownies into a fancy dessert by serving warm squares with a scoop of real vanilla ice cream and a drizzle of salty caramel sauce. The way the warm brownie meets cold ice cream creates an experience that's better than each part alone. I bring this combo out when I want to impress dinner guests without spending all day on dessert.
Make a fun sundae bar at parties by cutting brownies into tiny squares, then putting them out with ice cream, whipped cream, nuts, fresh berries, and different sauces. Everyone builds their own treats, and somehow this dessert station gets everyone talking. This setup has saved more than one awkward party at my house.
For a quick afternoon treat, enjoy a small brownie with strong coffee or espresso. The bitter coffee perfectly balances the sweet, rich chocolate. This is how I like these brownies best – it's my 3pm ritual at least once each week.
Flavor Twists
Coffee BoostThrow in 1 tablespoon of instant espresso powder with the dry stuff. It won't make the brownies taste like coffee, but it really brings out the chocolate flavor. This is my secret when I'm baking for serious chocolate fans.
Add Some CrunchMix in 1 cup of toasted chopped walnuts, pecans, or hazelnuts with the chocolate chunks. The difference between the gooey brownie and crunchy nuts creates a texture you can't stop eating. My husband won't even touch these brownies if they don't have nuts now.
Holiday TwistDuring Christmas season, swap out vanilla extract for 1/2 teaspoon of peppermint extract and top with crushed candy canes instead of extra chocolate chunks. These festive brownies vanish quicker than any cookie at our yearly neighborhood holiday swap.
Keeping Them Fresh
Counter StorageKeep fully cooled brownies in an airtight container at room temp for up to 3 days. Put parchment between layers if you stack them. The flavor actually gets better after a day as the chocolate taste develops more.
To keep them longer, put them in the fridge for up to a week. The cold makes them much firmer, so let them warm up to room temperature before eating for the best texture, or warm them briefly in the microwave for that just-baked feel.
Freezer ReadyThese brownies freeze really well for up to 3 months. Cut them into single pieces, wrap each one tightly in plastic, then store in a freezer bag. This way, you can thaw just what you need when chocolate cravings hit.
To thaw, unwrap and leave at room temperature for about 2 hours, or microwave for 15-20 seconds for that warm, gooey feel. Nobody will ever guess they were frozen.
 Save
Save
Clever Shortcuts
Chocolate ChoiceThe better chocolate you use, the better your brownies taste. This doesn't mean spending tons, just picking good quality chocolate you like to eat plain.
Foil HelperIf your brownies are getting too brown on top but still need to cook in the middle, just lay some aluminum foil loosely on top for the rest of the baking time.
Cutting SecretUse a plastic knife to cut brownies – it doesn't drag through the gooey middle like metal can. Sounds weird but it really works!
Last Valentine's Day, I put these brownies in small heart-shaped boxes for my daughter's teachers. One teacher sent me an email that night asking for the recipe because her husband had taken the whole box and she "needed to make more right away." That's what a truly perfect brownie does – it makes chocolate lovers forget all about sharing and moderation.
Recipe FAQs
- → How do these brownies get their fudgy texture?
- Using more fats like butter and oil compared to flour keeps the texture fudgy. Avoid mixing too much once dry ingredients are added to prevent an airy, cake-like texture.
- → How can I tell if they’re baked enough?
- Bake till the middle is set but still a bit soft when you gently shake the pan, around 25-30 minutes. A toothpick should come out with damp crumbs, not dry. Don’t forget, they’ll keep firming up after you pull them out.
- → Is Dutch cocoa powder okay to use?
- Definitely! Both Dutch-processed and natural cocoa powders work here. Dutch gives a smoother, mellow chocolate taste, while natural is more bold and fruity.
- → Why should the eggs be at room temperature?
- Room-temperature eggs mix better and help achieve that shiny crackly top. If eggs are cold, they might make the butter clump, which ruins the texture.
- → Can I make a bigger batch?
- Yep! Double everything up and use a 9×13-inch pan. Extend cooking time to 35-40 minutes. Check doneness with a jiggle test—the center should be soft but not fully set.