
 Save
Save
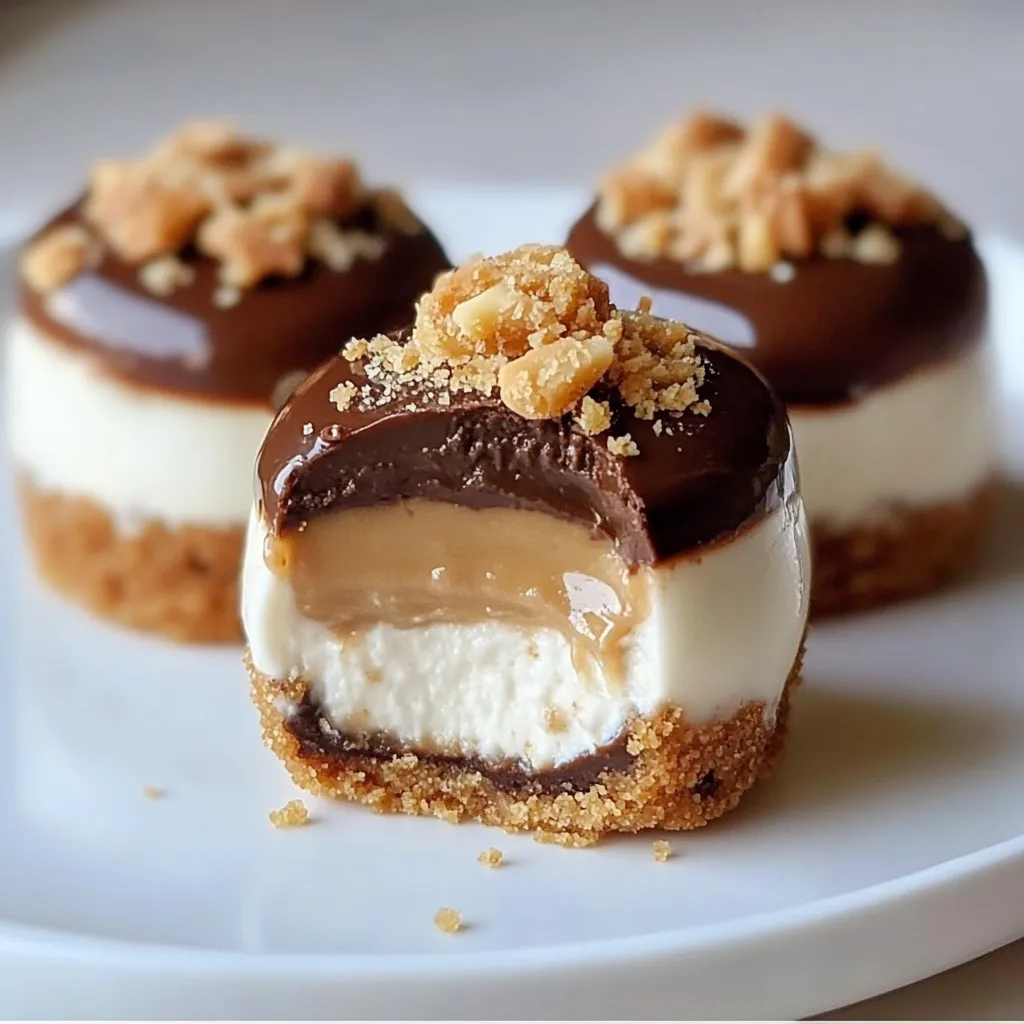
No-bake peanut butter cheesecake balls bring together everything I love about dessert — creamy, nutty, and deeply chocolatey bites with zero effort required from your oven. With a lush cheesecake layer, a gooey peanut butter surprise inside, and a slick chocolate jacket topped with crunch, these are guaranteed crowd-pleasers. Whether you need a sweet for a gathering or just want something stashed for late-night cravings, these balls are the answer for when you want decadence without fuss.
I first made these when the AC in my kitchen broke and I needed a birthday treat. My family now asks for them every single holiday and I never mind because they are so much fun to make.
Ingredients
- Graham crackers or digestive biscuits: brings the classic cheesecake taste and crumbly base look for a fresh, buttery aroma
- Unsalted butter: for the crust helps it hold together choose high-quality for rich flavor
- Granulated sugar: boosts sweetness and structure choose superfine if possible
- Cream cheese: gives a tangy creamy cheesecake flavor go for full-fat blocks not whipped tubs
- Powdered sugar: sweetens the peanut butter core and ensures a silky texture sift to avoid lumps
- Heavy whipping cream: makes the filling airy and light use very cold cream for whipping
- Vanilla extract: rounds out and perfumes the cheesecake buy pure vanilla if you can
- Creamy peanut butter: is the star of the filling look for natural with minimal added sugar
- Semi-sweet or dark chocolate: creates a smooth snappy coating always taste before using
- Vegetable or coconut oil: in the chocolate coating for shine and easier dipping
- Chopped peanuts: for garnish adds crunch and contrast toast for extra richness
- For fancy extra drizzle: use more melted peanut butter over the top
Step-by-Step Instructions
- Prepare the Base:
- Combine graham cracker crumbs sugar and melted butter in a medium bowl until everything looks like damp sand. Press a bit into silicone molds or mini muffin cups making a firm flat base and chill in the fridge while prepping the filling.
- Make the Cheesecake Layer:
- Whip the cream cheese and sugar until fluffy with no lumps add vanilla and blend gently. Whip the heavy cream separately until soft peaks form then use a spatula to fold this into the cream cheese mixture very gently to keep it light. Spoon this into your molds over the crust pressing a little well in the center to fit the filling then chill again.
- Prepare the Peanut Butter Filling:
- Blend peanut butter powdered sugar and salt in a small bowl until you can easily shape it. Roll into small marble sized balls then gently press one down into the center well of each cheesecake cup and smooth the top with a spatula. Chill a further half hour or freeze if you want to speed things up.
- Remove and Shape:
- Once firm pop out the cheesecake balls and arrange on a tray lined with parchment. Freeze these for a brisk fifteen minutes this keeps things tidy when you do the chocolate coating.
- Prepare the Chocolate Coating:
- Melt chocolate with oil in a microwave in short bursts stirring until velvet smooth. Once thickened but pourable quickly dip each ball or spoon chocolate to coat all sides. Immediately add chopped peanuts so they stick.
- Chill and Serve:
- Cool the coated balls in the fridge at least one hour for the chocolate to set. Let them warm just a bit at room temp before eating for the best creamy inside. Serve with a flourish of extra peanut butter on top if you wish.
 Save
Save
The crunch of salty roasted peanuts on top is always my favorite part I remember my kids pressing the nuts onto the chocolate and giggling when they licked their sticky fingers before running off with a ball each
Storage Tips
Keep these beauties in a closed container in the fridge for up to five days and they actually taste even better the next day once flavors mingle. For long term dessert prep just pop them into the freezer in an airtight bag up to two months. Always thaw in the fridge so you keep that creamy texture and never let them sit out too long or the chocolate melts in warm weather.
Ingredient Substitutions
For a dairy free or vegan version swap the cream cheese for any plant based brand and the heavy cream for coconut cream. Use a vegan butter and dairy free chocolate too. Swap the peanut butter for almond butter or even chocolate hazelnut spread if you want a nutty twist or cater to allergies.
Serving Suggestions
Make your dessert board shine by piling these balls with berries pretzels and cookies or just present a platter crowned with a zigzag of extra peanut butter. I love dropping them into mini cupcake liners for parties or—on holidays—dressing them up with a dot of edible gold for festive flair.
 Save
Save
Cultural and Historical Context
No bake cheesecakes have been a summertime staple since home refrigerators made chilled desserts a kitchen classic in the early twentieth century. The brilliance of these cheesecake balls is how they blend this tradition with our modern craving for easy hand held desserts a trend I see every time I host a potluck and these vanish before anything else.
Recipe FAQs
- → How can I prevent the cheesecake filling from being too runny?
Ensure your cream cheese is softened but not melted, and gently fold in whipped cream to preserve its structure. Extra chilling helps it firm up before shaping.
- → Are there dairy-free options?
Yes! Use plant-based cream cheese, coconut cream instead of dairy, and dairy-free chocolate for a vegan-friendly treat.
- → Is the crust layer required?
No, you can skip the crust if you prefer a smoother bite. Simply shape and assemble using the filling and peanut butter core.
- → Can the batch size be increased?
Absolutely. Double or triple the quantities as needed, and use larger mixing bowls or more molds to handle bigger batches.
- → How do I achieve a glossy chocolate finish?
Adding a splash of coconut oil to your melted chocolate, or carefully tempering it, gives a shinier, more professional look.
- → How should these be stored?
Refrigerate them in an airtight container for up to five days, or freeze for up to two months for longer storage.