
 Save
Save
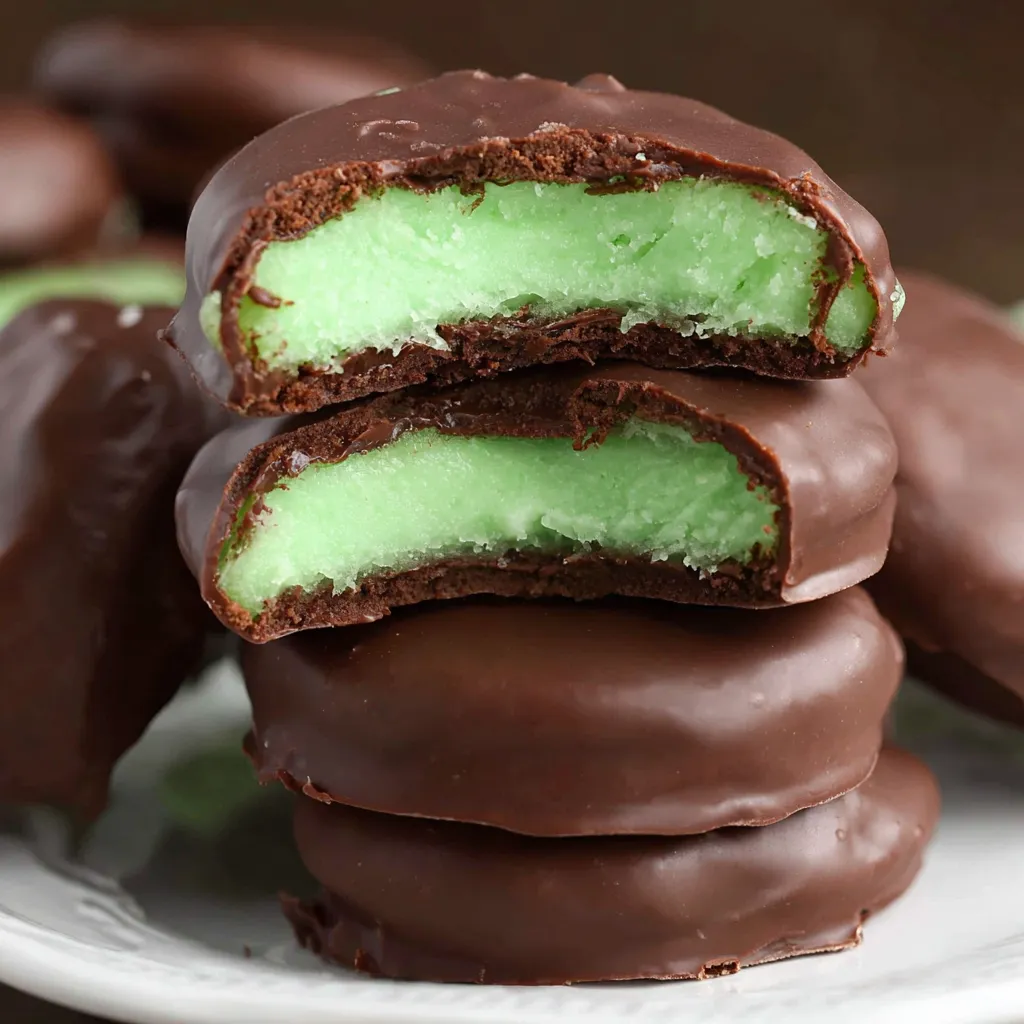
Chocolate Covered Mint Patties are the perfect treat for when you want a little something cool and chocolatey but do not want to spend hours in the kitchen. With a creamy mint filling and a rich chocolate shell, these candies are always a hit at holiday gatherings or tucked into lunchboxes for a surprise. With this easy method, you can skip the store-bought box and make your own batch in less than an afternoon.
My family always asks for these mint patties at Christmas. I first made them with my kids as a weekend project and now it is a tradition we look forward to every year.
Ingredients
- Light corn syrup: gives the filling its signature creamy chew and shine. Look for clear syrup for the best color
- Butter: softened helps the center stay rich and smooth. Use a good quality unsalted butter for a clean flavor
- Mint extract: brings the cooling minty hit. Pure peppermint extract gives a natural taste but any favorite mint variety will do
- Salt: adds balance and keeps the sweetness in check. Fine sea salt blends in perfectly
- Green food coloring: makes them festive and fun. Gel types give brighter color without watering down your dough
- Powdered sugar: 4 to 5 cups firms up the mixture and gives that meltaway texture. Use a fresh box for lump-free results
- Chocolate candy coating: melts smoothly and sets up fast. CandiQuik is easy to use but any melting chocolate works
Step-by-Step Instructions
- Make the Filling:
- Combine corn syrup softened butter mint extract salt and a few drops of food coloring in a medium bowl. Stir together until the color and flavor are evenly distributed and the mixture looks creamy and pale green.
- Mix and Knead:
- Gradually mix in powdered sugar one cup at a time. When it becomes too stiff to stir switch to kneading with your hands adding more sugar as needed until the dough no longer sticks.
- Shape the Patties:
- Roll small pieces of dough into one-inch balls. Place on a baking sheet lined with wax paper. Flatten each ball gently with your palm or a flat-bottomed glass.
- Chill and Set:
- Cover patties with another sheet of wax paper. Refrigerate for one to one and a half hours until they are firm and cool to the touch. This makes dipping easier.
- Melt the Chocolate:
- Melt your chocolate candy coating following the instructions on the package. It should be smooth and liquid but not overly hot.
- Dip and Finish:
- Take one patty at a time and dip it in the melted chocolate using a fork to let excess drip off. Return to the waxed paper. Repeat until all the patties are coated.
- Let Set and Store:
- Allow the chocolate to harden fully at room temperature. Once set store patties in an airtight container. Separate layers with wax paper to avoid sticking.
 Save
Save
I love working with the mint extract in this recipe. The bright scent always reminds me of snow days spent at home making treats with my sister. When the whole kitchen smells minty fresh it feels like the holidays have started.
Storage Tips
Once the chocolate shell is set keep these patties in an airtight container in the fridge for up to three weeks. For longer storage freeze in single layers separated by wax paper. To serve thaw at room temperature for fifteen minutes so the centers are creamy again.
Ingredient Substitutions
Try butter flavored coconut oil for dairy free patties. If you prefer white chocolate dip the patties in melted white coating instead. For an all-natural version use green plant powder or spinach juice instead of food coloring for a subtle tint.
Serving Suggestions
Tuck these mint patties into lunchboxes or snack trays for an after school treat. They make wonderful gifts packed in a pretty tin or bag. At parties arrange them alongside fresh fruit or use as an ice cream topping for a custom sundae.
 Save
Save
Cultural Context
This homemade version is inspired by classic American peppermint patties popular since the 1940s. Making them at home is a holiday tradition in many families and a fun way to get children involved in the kitchen. Personalizing the color or chocolate shell makes each batch special.
Recipe FAQs
- → How do I keep the filling from sticking to my hands?
Knead in more powdered sugar until the dough is smooth and no longer tacky to touch before shaping the patties.
- → Can I use dark or white chocolate for coating?
Yes, both dark and white chocolate work well as coatings and can offer a twist on classic flavors.
- → How should I store homemade mint patties?
Store them in an airtight container at room temperature or refrigerate for longer freshness. Layers can be separated by waxed paper.
- → Are these candies freezer-friendly?
Yes, freeze individual layers separated by waxed paper for up to two months to enjoy at your convenience.
- → Can I change the filling color?
Absolutely! Use different food colorings for holidays or personal preference without changing the flavor.