
 Save
Save
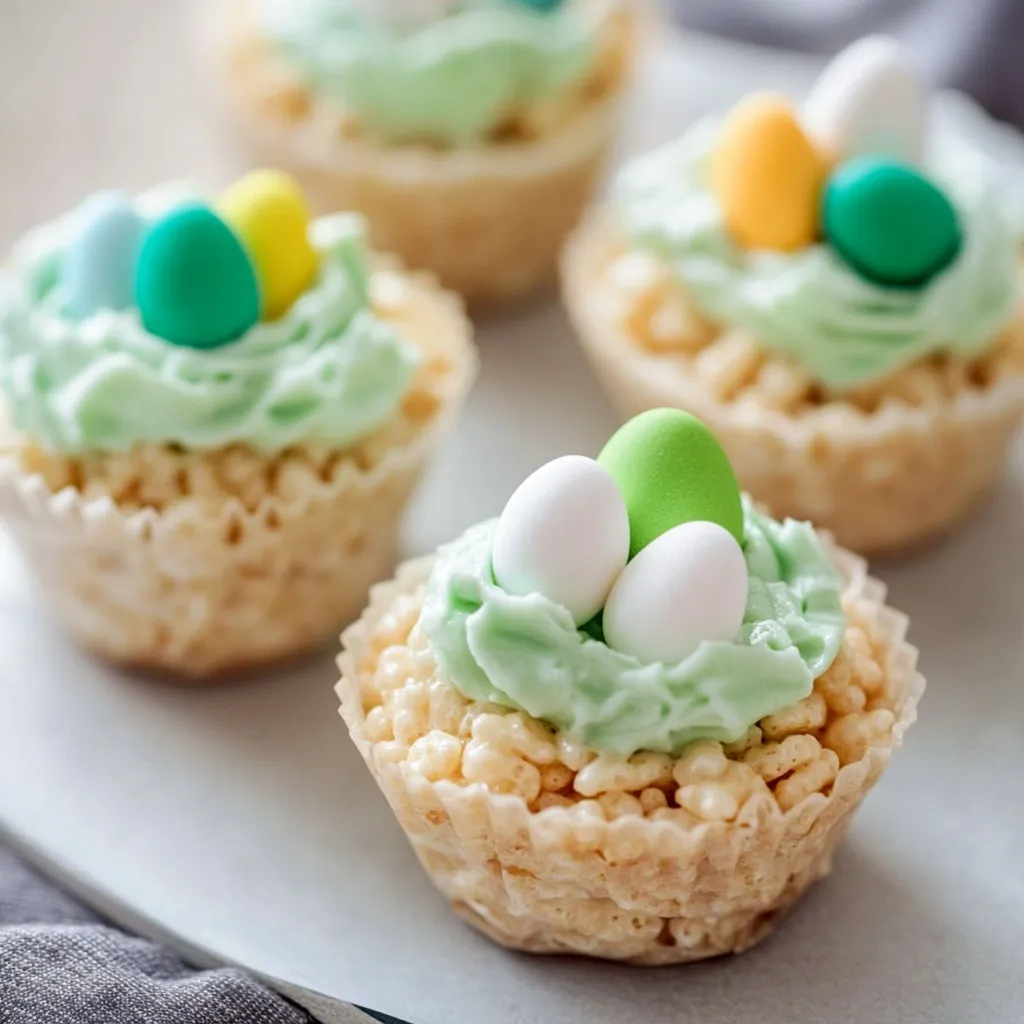
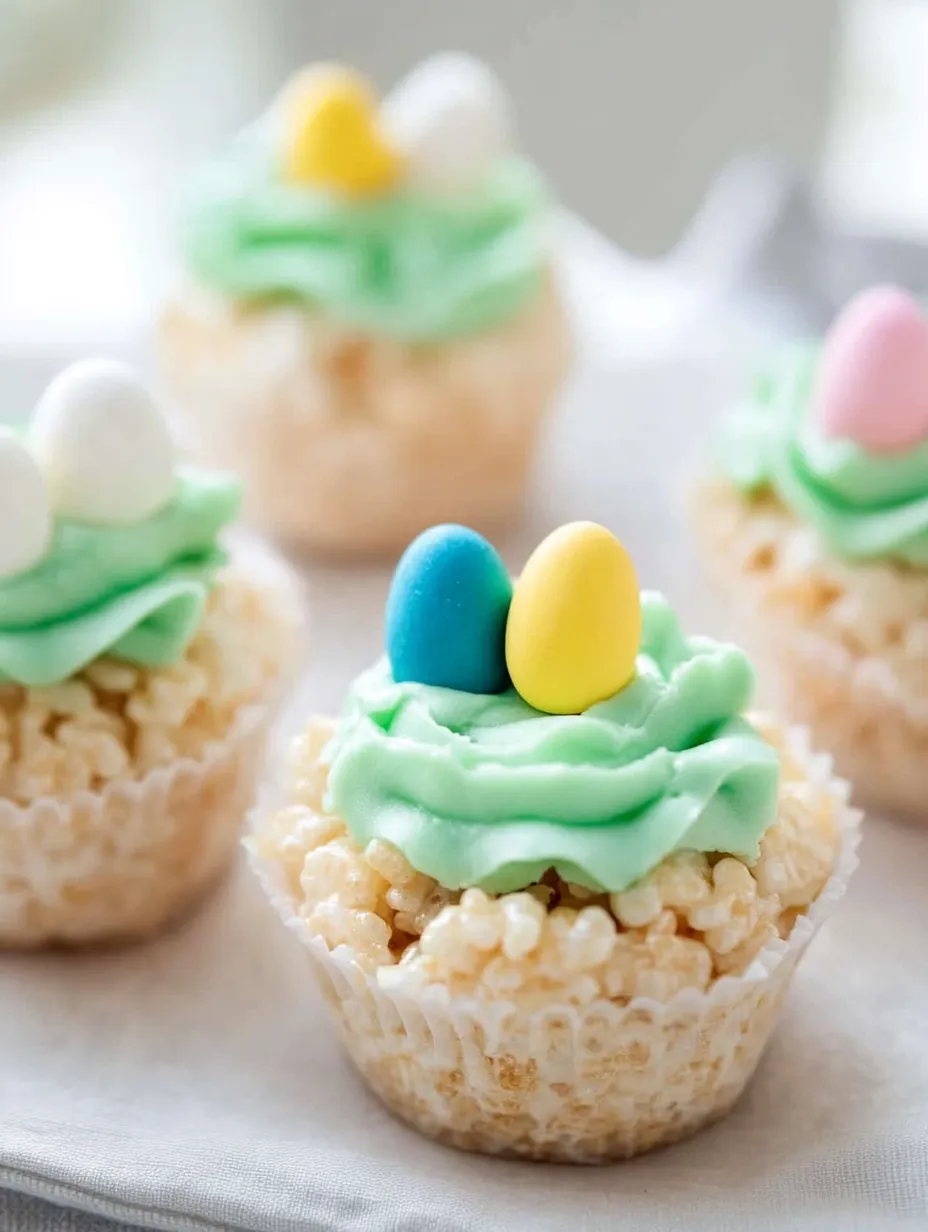
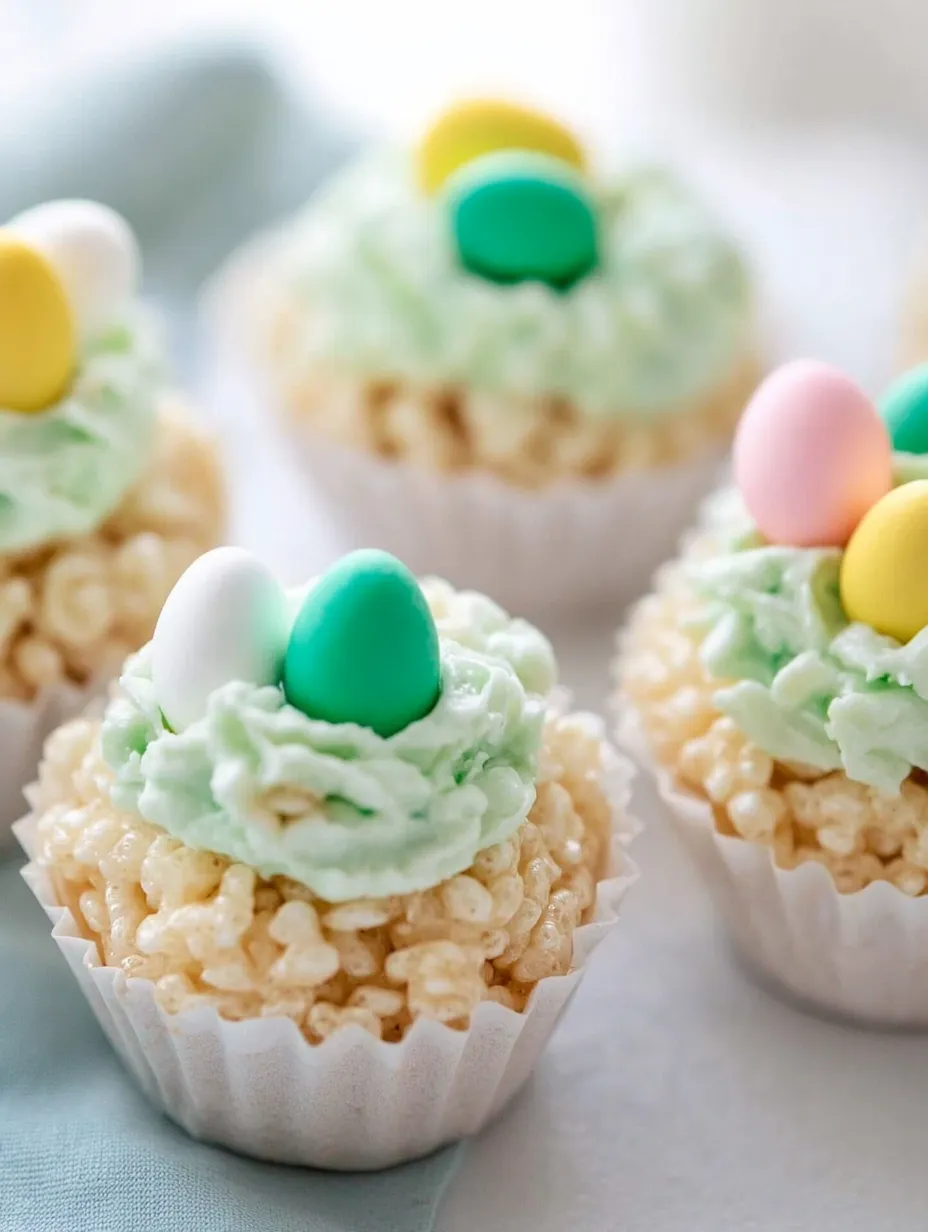
Looking for an Easter treat that goes beyond basic chocolate eggs? These charming marshmallow Rice Krispie nests capture the spirit of spring with their clever design. Each nest features a crispy marshmallow base topped with vibrant green buttercream "grass" and decorated with candy eggs. They're the perfect balance of whimsical presentation and familiar comfort food flavors.
These nests have become our cherished Easter tradition. The simple joy of watching little ones carefully place candy eggs into their own decorated nests makes all the preparation worthwhile. The familiar Rice Krispie base brings comfort while the festive decorations add that special holiday magic.
Key Components
- Fresh marshmallows: Use new marshmallows for the best melting qualities. Both regular and mini sizes work well.
- Rice Krispies cereal: The classic choice for that signature crunch. Fresh cereal ensures proper texture.
- Unsalted butter: Provides richness and helps prevent sticking during preparation.
- Decorative eggs: Mini chocolate eggs or speckled malted milk balls work best for realistic nests.
- Buttercream ingredients: Quality butter creates superior frosting. Adjust sugar ratios for desired piping consistency.
- Green food coloring: Gel colorings provide vibrant color without thinning the frosting.
 Save
Save
Preparation Steps
- Prepare equipment:
- Thoroughly grease cupcake tins. This critical step prevents sticking issues later.
- Create marshmallow base:
- Microwave marshmallows and butter in 30-second intervals until completely smooth. Stir between each heating.
- Mix cereal:
- Fold Rice Krispies into melted mixture until evenly coated. Work efficiently as mixture sets quickly.
- Form nests:
- Fill prepared tins with mixture. Create depressions using waxed paper to shape nests.
- Cool completely:
- Allow 30 minutes for nests to set firmly. This ensures proper shape retention.
- Prepare frosting:
- Beat butter until fluffy, gradually incorporate sugar and coloring to achieve grass-like texture and color.
- Final assembly:
- Pipe green frosting onto cooled nests. Place candy eggs while frosting remains soft.
Through trial and error, I've discovered that greasing pans thoroughly works far better than paper liners. Using warmed measuring cups prevents marshmallows from sticking during preparation. These small techniques make a noticeable difference in the final results.
Presentation Ideas
Display these nests on tiered stands amidst spring flowers for maximum impact. Use them as creative place card holders at Easter brunch by adding small name flags. Package individually in cellophane bags with pastel ribbons for guest favors or Easter basket treats.
Creative Variations
Consider using Cocoa Krispies for chocolate nests or Fruity Pebbles for colorful speckled versions. Add citrus zest to the marshmallow mixture for bright spring flavor. For adult gatherings, incorporate Irish cream into the buttercream frosting.
Storage Guidelines
Store completed nests at room temperature in airtight containers for 2-3 days. Avoid refrigeration as it hardens the texture. For advance preparation, store plain nests and decorate closer to serving time. Keep away from heat sources to prevent frosting from melting.
 Save
Save
These festive nests consistently bring smiles to holiday gatherings. Their charm lies in transforming simple ingredients into something truly special for Easter celebrations. The combination of familiar taste and creative presentation makes them a requested favorite year after year.
Recipe FAQs
- → Can I make Krispie nests in advance?
- Definitely! Prepare them 1-2 days before serving and keep them in an airtight container. Add frosting and candy just before serving for a fresh look.
- → Why did my Krispie treats turn out hard?
- They can get tough if pressed too tightly in the pan or if the marshmallows are melted for too long. Use light pressure and carefully melt the marshmallows.
- → Can ready-made frosting replace homemade buttercream?
- Sure! Use store-bought vanilla frosting. Just mix in green food coloring, and you’re good to go. It’s a simple shortcut if you're short on time.
- → How can I easily remove the nests from the cupcake tin?
- Grease the tin thoroughly before adding your mix. Once set, gently slide a butter knife along the edges or let them warm up slightly at room temp if they won’t budge.
- → What other candy options work in the recipe?
- Mini eggs are great, but you could also try jelly beans, pastel M&Ms, Cadbury eggs, or small Jordan almonds. Just pick something small and egg-like.
- → What’s the easiest trick to shape the nests?
- While the Krispie mix is warm, push down in the center with your thumb or grease a spoon and press. You could also use wax paper on your fingers to mold it neatly.