
 Save
Save
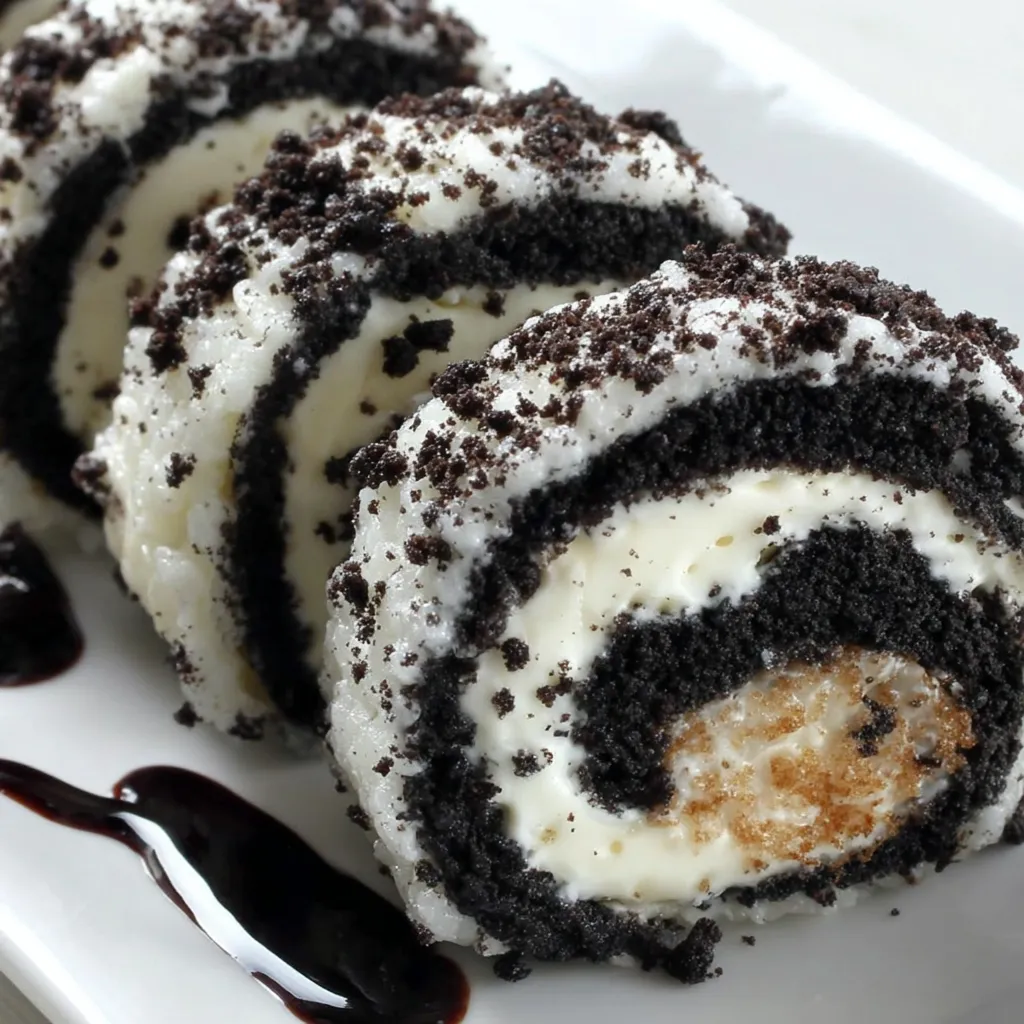
Oreo sushi is my go to sweet treat when I want something playful and easy that still wows everyone at the table. No oven or special skills required just a handful of Oreos and a little milk and you are on your way to dessert fun that looks like sushi but tastes like classic cookies and cream.
The first time I made Oreo sushi my niece could not stop giggling at how cute the rolls looked. Now we make it for every cousin sleepover and it never lasts more than a few minutes on the table.
Ingredients
- Oreos: For that rich chocolate sandwich cookie flavor and creamy filling I like to use the original version but go for Double Stuf if you love extra cream. Make sure they are fresh for the best result.
- Milk: Helps the cookie crumbs hold together like real dough. Whole milk works best for the creamiest texture but you can use any milk you have on hand.
- Rolling plastic wrap and a rolling pin: Make sure your surface is clean and use a sharp knife for neat slices.
Step-by-Step Instructions
- Blitz the Oreos:
- Use a food processor to pulse all the cookies until you have even fine crumbs. Go long enough that there are no big chunks left since this will help the dough stick together later.
- Form the Dough:
- Add a few tablespoons of milk to your Oreo crumbs and pulse again until it starts clumping together. If you can squeeze it and it holds its shape you are done. If the dough looks dry add a tiny bit more milk.
- Shape and Roll Flat:
- Gather the Oreo dough onto a sheet of plastic wrap. Use your hands first to press it into a rough square then bring in a rolling pin to flatten the dough until it is about a quarter inch thick. Trim the edges so you end up with an even square which makes pretty sushi rolls.
- Prepare the Cream Filling:
- Scoop all the Oreo cream into a small bowl. Add two teaspoons of milk and mix until it is silky and easy to spread. This will be your “rice” layer in the sushi.
- Spread and Roll:
- Spread the cream evenly from edge to edge over your Oreo dough square. Work slowly so you do not tear the dough. Now use the plastic wrap to help you roll the whole thing up tightly into a log.
- Chill and Slice:
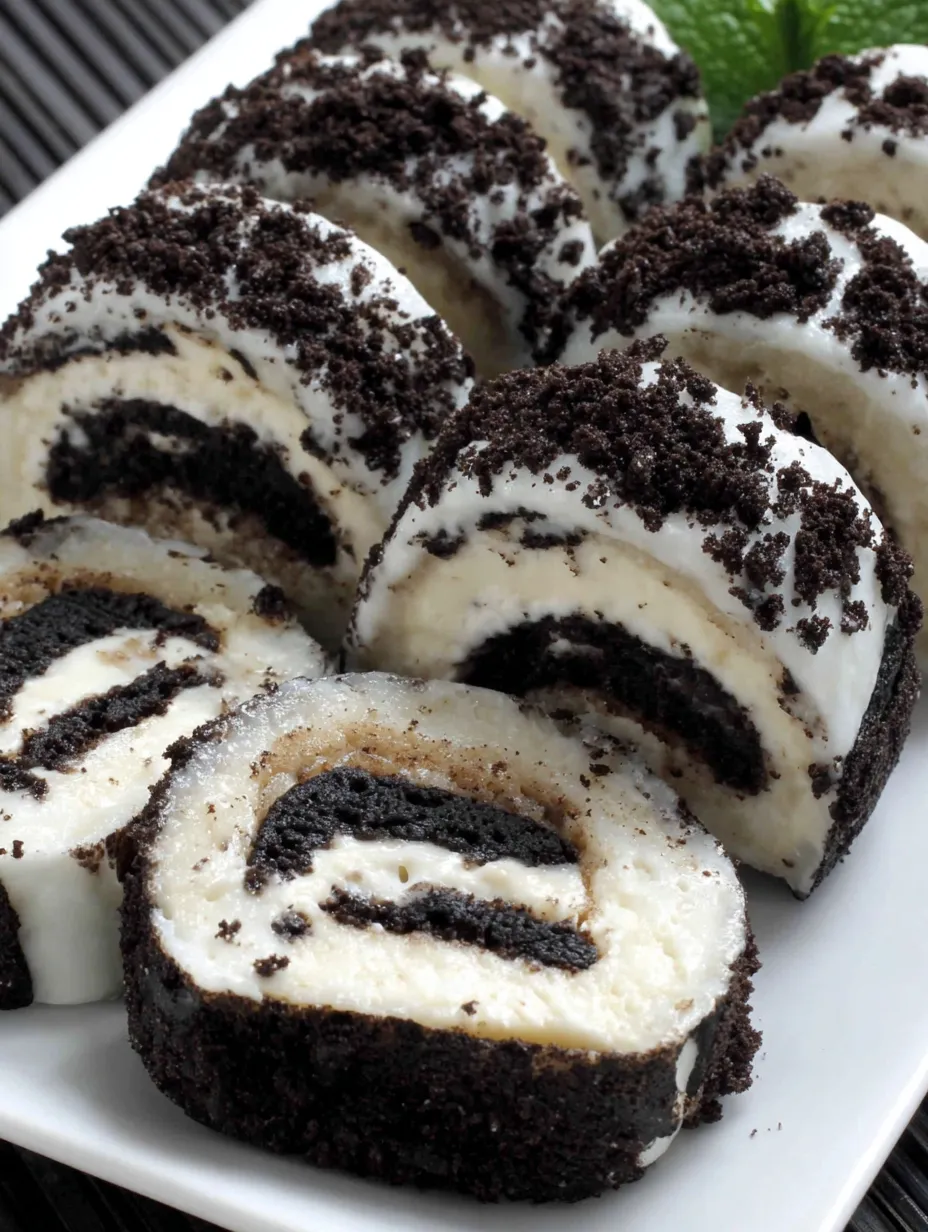
- If you want extra neat pieces wrap the roll in plastic wrap and chill it for ten to fifteen minutes. Use a sharp knife to slice the log into thick coins. Serve on a plate just like sushi.
 Save
Save
Every time I make this dessert with family we end up arguing over who gets the end pieces since those are the ones with the cutest cream swirls. My favorite ingredient has always been the Oreo cream which reminds me of trading halves at lunch as a kid.
Storage Tips
Store leftover Oreo sushi rolls in an airtight container in the fridge for up to three days. If you have made a double batch and want to keep them longer freeze the individual slices in a single layer then transfer to a bag. They thaw in a few minutes on the counter.
Ingredient Substitutions
If you do not have Oreos try other sandwich cookies with a cream filling for a twist on flavor. For a dairy free version almond or oat milk works just as well as cow milk. For extra texture try adding a thin layer of peanut butter or fruit jam with the Oreo cream.
Serving Suggestions
Present your Oreo sushi on a platter with chopsticks for added fun. You can drizzle with white chocolate or serve alongside berries for some freshness. Set out little bowls of chocolate sauce or dulce de leche as a “soy sauce” dip to really lean into the sushi theme.
 Save
Save
Cultural Context
This dessert is an example of kawaii style food trends from Japan but made with an all American twist. Oreo sushi is all about playful presentation so it is a favorite for parties with kids or themed gatherings where everyone gets a laugh out of sushi made with cookies instead of fish.
Recipe FAQs
- → What’s the best milk to use for Oreo sushi?
Whole milk gives a rich texture, but any milk or non-dairy option will combine well with Oreo crumbs for a soft dough.
- → Can I make these ahead of time?
Yes, chilling the rolled dough makes slicing easier and can be done a day ahead. Store slices in the fridge until serving.
- → How do I keep the roll from sticking?
Rolling between sheets of plastic wrap prevents sticking and helps shape the dough smoothly. Lightly dust hands if needed.
- → Can variations be made with other cookies?
Absolutely! Substitute Oreos with similar sandwich cookies. Adjust milk to account for dryness or creaminess.
- → Is special equipment required?
A food processor gives fine crumbs, but cookies can also be crushed in a sealed bag using a rolling pin.
- → How thick should I roll the dough?
Rolling the dough to about 1/4 inch provides a sturdy base for spreading the cream and rolling without breaking.