
 Save
Save
Last Easter morning, I whipped up these Bunny Cinnamon Rolls with my kiddos, and they were such a success that my little girl already asked if we'll make them again! They're super easy but look like you spent forever making something fancy - just what you want on a holiday morning when you need something fun without all the work.
When I sent a picture to my husband's mom, she thought I'd done everything from scratch - that's how good they look even though they only take minutes to put together!
Stuff You'll Need
- Canned cinnamon rolls: Go for the big ones like jumbo or Grands! They're better for shaping. Both Pillsbury and grocery store versions work great.
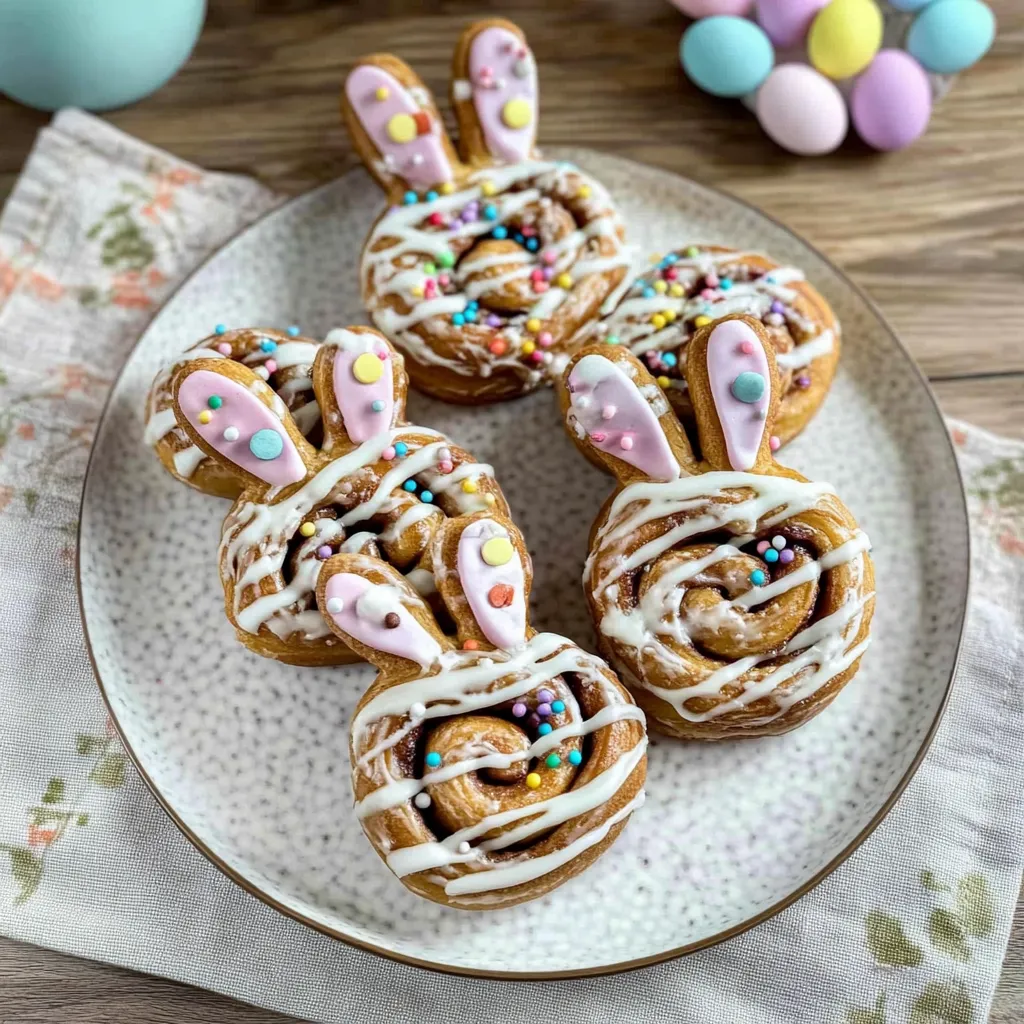
- Easter sprinkles: Those soft-colored Easter sprinkles really make them festive. Regular rainbow ones work in a pinch too.
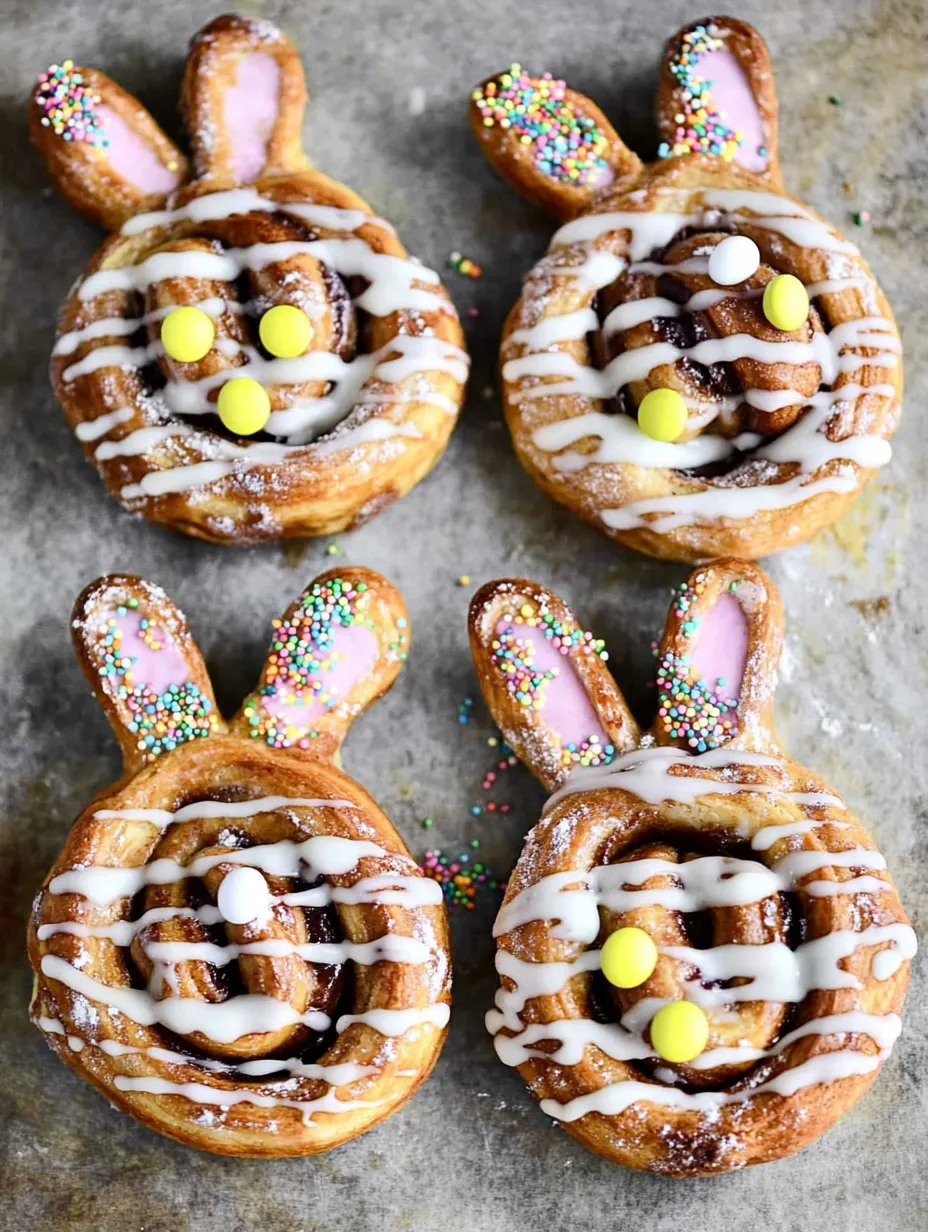
- Candy decorations: Round candies like M&Ms work perfectly for eyes and noses. I stick with pink, yellow, or blue to match Easter colors.
- Parchment paper: Saves you from scrubbing pans and keeps everything from sticking.
 Save
Save
My Making Method
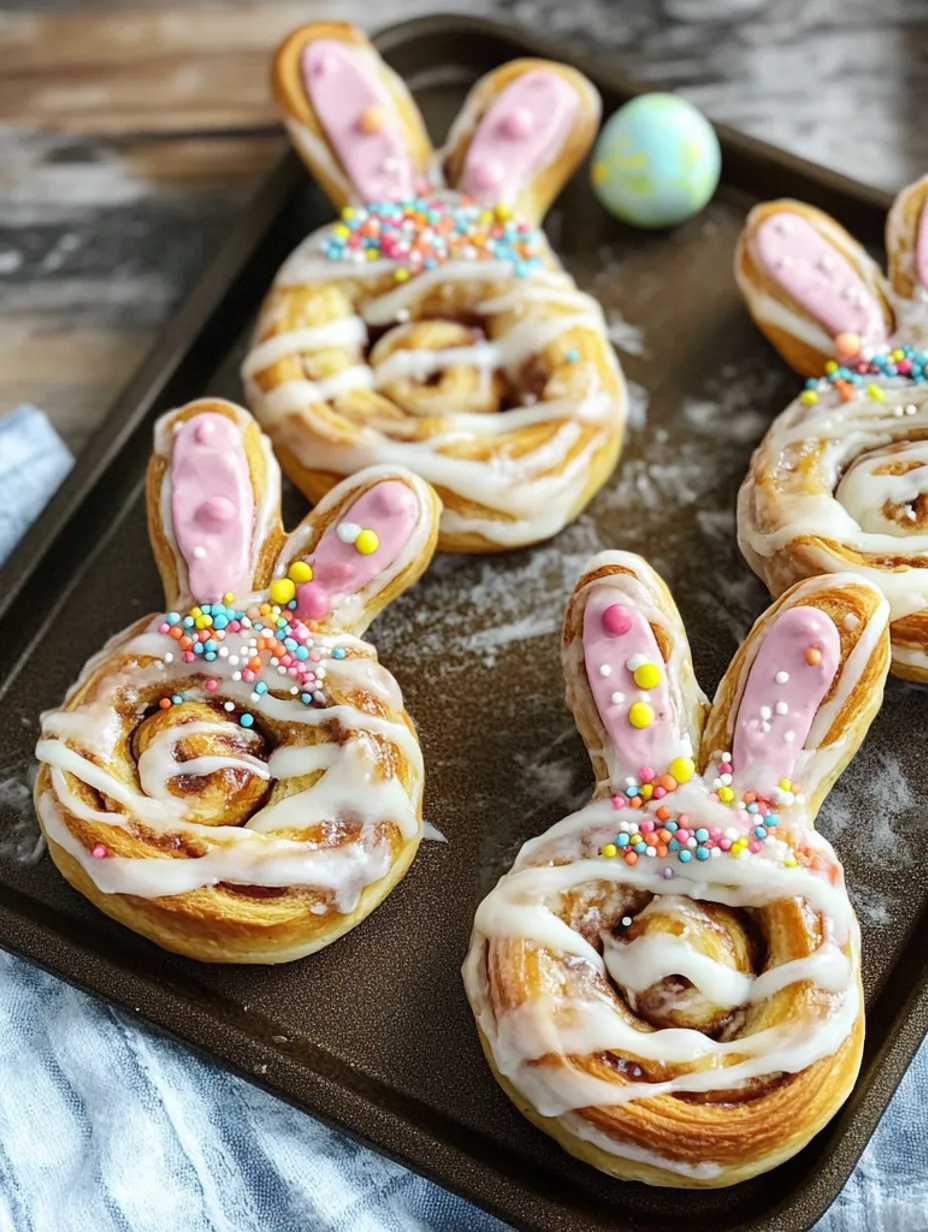
Basic Bunny FormingThe cool part is how you shape them, and it's actually really simple! I just grab the outer edge of each roll and pull it upward to create ears, then push between them to make that classic bunny head shape. The dough isn't fussy, so you can mess with it until it looks right.
Halfway Baking FixThe smart trick that really makes these work is taking them out midway through cooking to fix the shape. As they puff up, the ears can start to disappear, but quickly reshaping them with a wooden spoon handle keeps them looking like bunnies.
Fast Finishing TouchesWhen it comes to decorating, you've gotta add the sprinkles right after you put on the icing while it's still warm and gooey. This makes sure they stick well and don't fall off. The candy eyes and nose need to go on right away too.
Timing TricksI've learned that getting all my decorating stuff ready before the rolls finish baking makes everything go smoother, since you need to work fast while the icing stays sticky.
I found this idea a couple years back during our lockdown Easter when I was trying to find easy ways to make the holiday fun despite not seeing our extended family. Now the kids can't wait for it each year!
Ways To Serve Them
These little bunnies look super cute as the main attraction on your Easter breakfast table. I like putting them on a big plate with fresh berries scattered around for color. For a full Easter morning meal, add some fluffy eggs and crispy bacon on the side. You could even build an entire bunny-themed breakfast board with these as the main stars!
Switch It Up
Try playing with different candies for faces - tiny chocolate chips make sweet eyes too. Mix some pink food coloring into part of the icing for pink ears. Want a chocolate version? Go with chocolate chip cinnamon rolls instead. Feeling fancy? Skip the canned stuff and use your own cinnamon roll dough.
Helpful Hints
They taste best right out of the oven while they're still warm. If you need to get ahead, you can shape them the night before, cover with plastic wrap in the fridge, then bake in the morning. Just add an extra minute or two of baking time if they're cold from the refrigerator.
 Save
Save
Expert Advice
- Put parchment on your baking sheet so nothing sticks and cleanup is faster
- Leave plenty of room between each bunny since they grow a lot during baking
- Keep a bit of extra icing to draw whiskers using a toothpick after decorating
These Bunny Cinnamon Rolls have become a big part of our holiday fun. There's something so wonderful about watching my kids' eyes light up when they see those cute bunnies lined up on the baking sheet. It's those simple things - working together on shaping the dough, picking which M&M colors to use for the eyes, and then sitting down to enjoy our creation - that build those special holiday memories that last.
Recipe FAQs
- → Can I use my own cinnamon roll dough?
- Yes, you can! Make the bunny shapes before letting your dough rise one last time. Just ensure it's soft and easy to shape.
- → Why adjust them in the oven halfway?
- They puff up when baking, which might mess up the ear shapes. Fixing them partway through keeps them looking nice.
- → What can I use instead of M&M's?
- Any small candies work—mini choc chips, Reese's Pieces, or raisins. Halved jelly beans are great too.
- → Can I prepare these in advance?
- They’re best fresh and warm. But you can make them a day earlier and reheat quickly, though they might not stay as soft.
- → How do I tell when they’re ready?
- They’ll turn golden on top. Check the middle of a roll—it should be firm, not gooey.