 Save
The best plumber's trick to save toilet water is not to hang a random weight inside the tank. It is to make the toilet seal correctly, refill to the right level, and prove the fix with a dye test. A toilet that looks quiet can still leak from the tank into the bowl, and EPA WaterSense says the average household's leaks can waste more than 9,300 gallons each year, with worn toilet flappers among the common causes https://www.epa.gov/watersense/fix-leak-week. If you want a low-cost first move, check the flapper, chain, fill valve, and overflow tube before changing how much water the toilet was designed to use.
What Plumbers Are Really Looking For
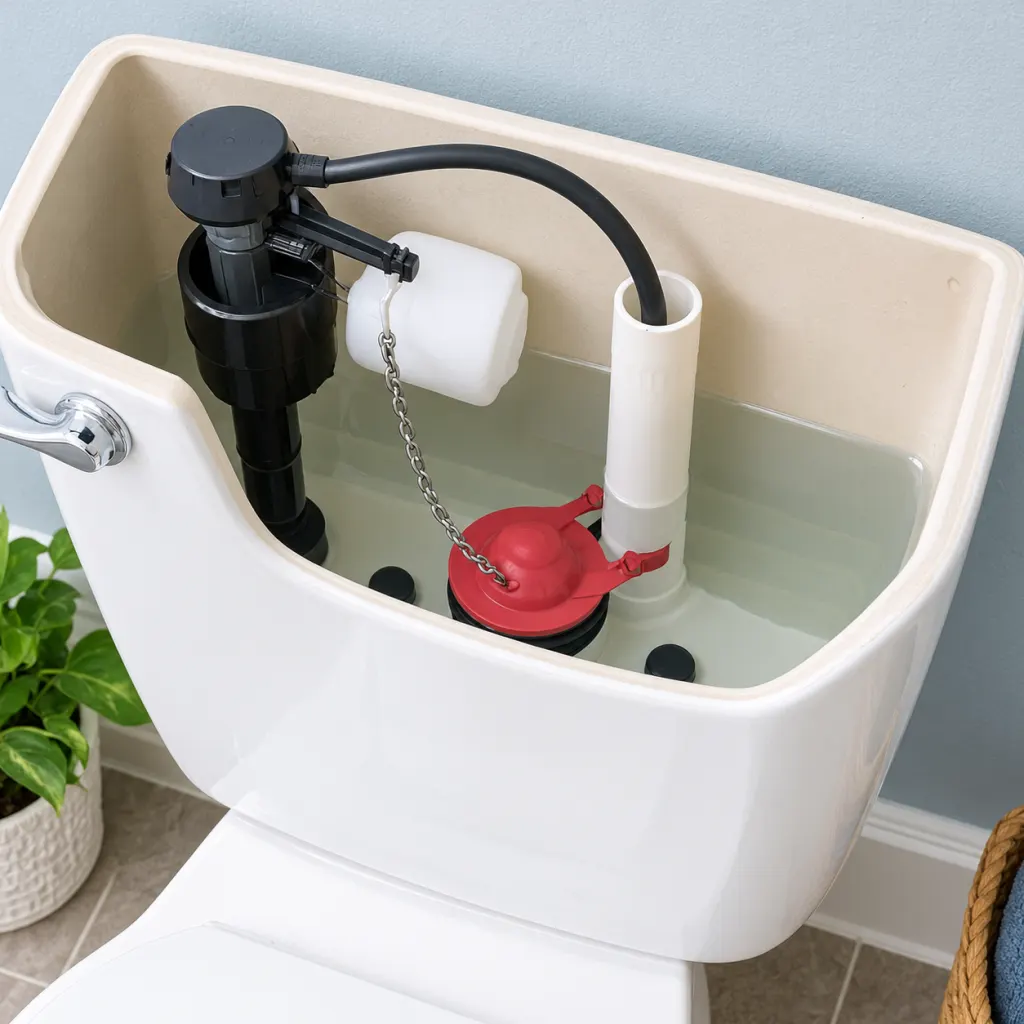
When a plumber opens a toilet tank, the useful question is not simply, 'How can this tank hold less water?' The better question is, 'Is water leaving this tank when nobody is flushing?' A standard gravity toilet stores water in the tank and releases it quickly through the flush valve. The rubber or silicone flapper sits over that opening. If the flapper is warped, scaled, cracked, chained too tightly, or sitting on a rough valve seat, a thin stream can pass into the bowl all day. You may not hear it. You may not see ripples. The refill valve may only top up the tank now and then, which is why people often miss the problem until a bill changes.
That is why the practical 'trick' is really a diagnosis routine: look, test, replace the small worn part, and retest. EPA WaterSense explains that old or worn-out flappers can cause leaks and recommends checking them periodically, with replacement at least every five years to keep a good seal https://www.epa.gov/watersense/fix-leak-week. A new flapper is inexpensive compared with months of silent tank loss, but it must match the toilet model. The wrong style can close too soon, float too long, or leave a gap that recreates the very problem you were trying to solve.
Why the Weight-in-the-Tank Shortcut Is Risky
You may hear a version of this tip that says to attach a small weight to the flapper so it drops more firmly after a flush. The idea sounds tidy, but it can create new problems if the weight interferes with the lift, changes the flush timing, corrodes, catches the chain, or keeps the flapper from seating flat. Toilets are designed around a particular flush volume, bowl shape, trapway, tank height, and valve setup. Changing one part of that timing without understanding the fixture can lead to weak flushing, repeated flushing, or another leak.
EPA's WaterSense at Work guidance is especially clear about improvised tank retrofits: in general, it advises avoiding displacement dams or bags, early-closing flappers, and valves with different flush volumes in existing tank-type toilets because they can reduce overall performance, increase maintenance, increase water consumption, and void manufacturer warranties https://nepis.epa.gov/Exe/ZyPURL.cgi?Dockey=P1017K41.TXT. That guidance is written for facilities, but the logic applies at home too. A toilet that needs two flushes after a shortcut is not saving much water.
Do the Ten-Minute Dye Test First
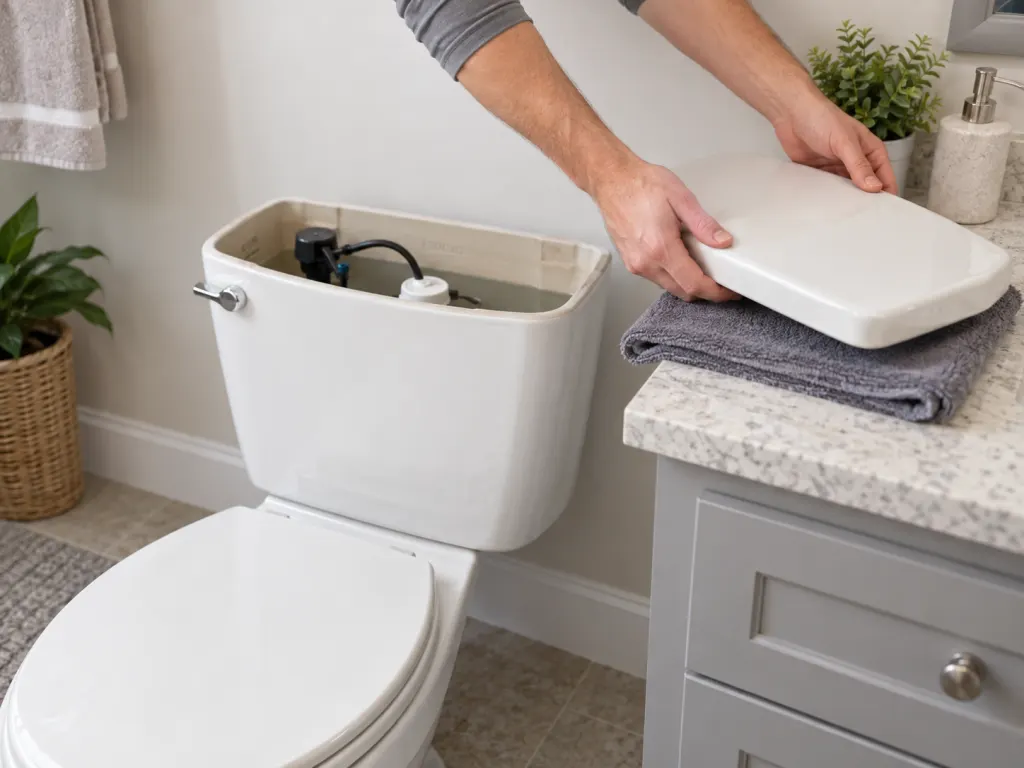
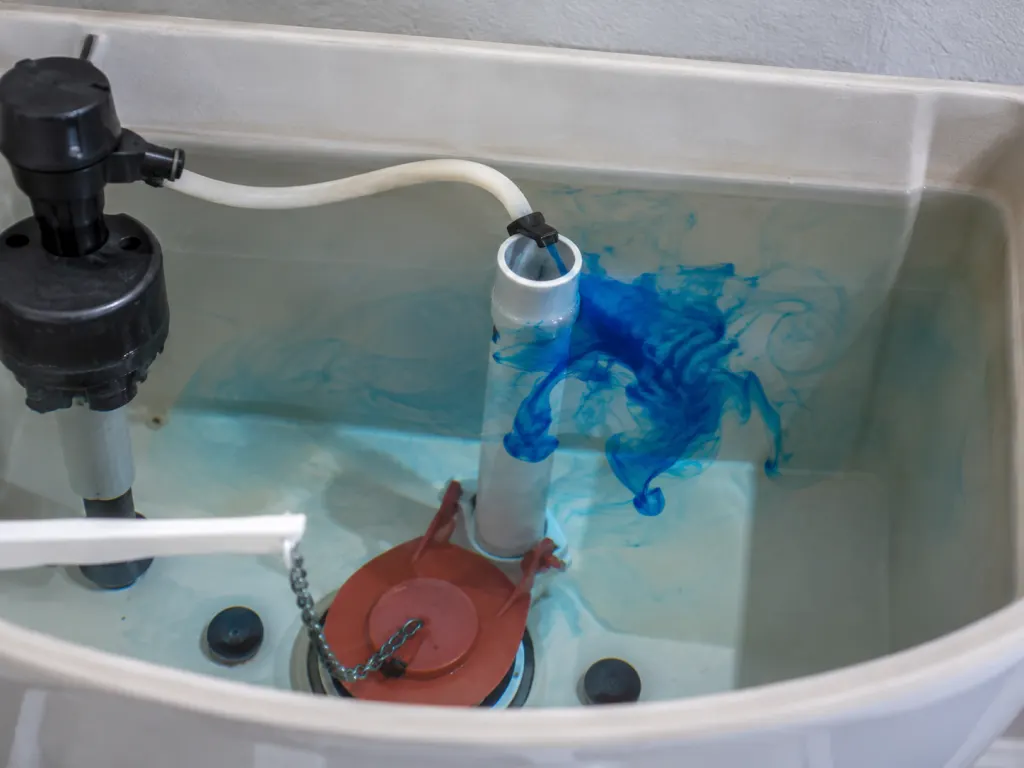
Before buying parts or adjusting anything, test the toilet. Remove the tank lid carefully and set it flat on a towel. Put a few drops of food coloring or a dye tablet into the tank, then wait about 10 minutes without flushing. If color appears in the bowl, water is passing from the tank into the bowl. EPA gives this same method for identifying toilet leaks and says to flush right after the test to avoid staining the tank or bowl https://www.epa.gov/watersense/fix-leak-week. This one test separates real leaks from guesses.
If no color appears, the toilet may not be leaking through the flapper at that moment. You can still inspect the water level and chain, but there is less reason to start modifying parts. If color appears, move slowly. Check whether the chain is tangled or pulled so tight that the flapper cannot settle. Check whether the flapper feels brittle, slimy, warped, or misshapen. Check whether the seat under it is rough with mineral buildup. The goal is a clean, flat seal and a chain with enough slack to let the flapper close, but not so much slack that the handle cannot lift it.
Set the Water Level, Not Just the Flapper
A second common waste point is the refill level. Inside the tank, the overflow tube is the vertical tube near the flush valve. If the tank fills above that tube, water spills down it and into the bowl. This can look like a running toilet, but it can also be subtle. EPA's WaterSense at Work guidance says to check that the refill water level is set one inch below the top of the overflow tube and to adjust the float lower if the level is too high https://nepis.epa.gov/Exe/ZyPURL.cgi?Dockey=P1017K41.TXT. Many tanks also have a molded waterline mark on the inside wall. Use the mark if your toilet has one.
Modern fill valves usually adjust with a screw, clip, or sliding float cup. Older ball-float assemblies may adjust by gently changing the arm position or using a screw at the valve. Do not force parts that feel brittle. After an adjustment, flush once, let the tank refill fully, and watch where the water stops. If the water keeps creeping into the overflow tube after the float is lowered, the fill valve may need replacement rather than more adjustment.
Buy the Correct Flapper or Seal
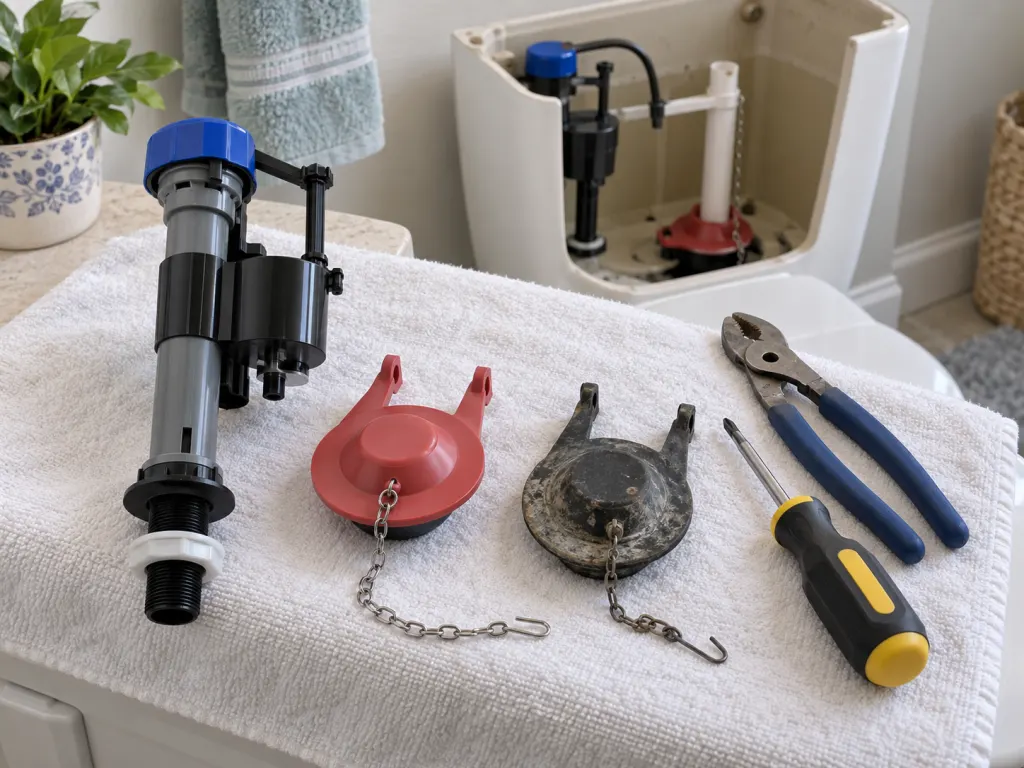
Flappers are not universal in the practical sense, even when packaging makes them look interchangeable. Some toilets use a two-inch flapper, some use a three-inch flapper, and some newer models use a canister-style seal instead of a flap. Some flappers have a float on the chain to control how long the valve stays open. EPA recommends bringing the old flapper, or a picture of it, when buying a replacement, and paying attention to the width and any foam float that may also need to be replaced https://www.epa.gov/watersense/fix-leak-week. This is a small detail that prevents a lot of repeat trips.
Turn off the supply valve at the wall, flush to empty most of the tank, and remove the old flapper from its mounting ears or posts. If there is a chain, note which handle hole it used. Install the new flapper, reconnect the chain with slight slack, turn the supply back on, and let the tank refill. Flush several times. The handle should lift the flapper cleanly; the flapper should close without wobbling, folding, or hanging up. Then repeat the dye test. A repair is not finished until the bowl stays clear during the waiting period.
A Simple Inspection Routine
A toilet does not need constant attention, but it benefits from a quick routine. EPA's home maintenance guidance recommends checking silent toilet leaks at least once a year with dye and replacing flappers at least once every five years https://www.epa.gov/watersense/home-maintenance. Add the check to a seasonal home list or do it when you notice a change in the sound of the refill valve. A five-minute look can catch a small issue before it becomes a steady background loss.
- Listen after a flush: the refill should stop cleanly, not cycle on and off.
- Look at the overflow tube: the water should stop below the top of the tube.
- Check the handle: it should return freely without holding the chain tight.
- Inspect the flapper: it should be flexible, flat, and matched to the fixture.
- Run the dye test: color in the bowl means water is crossing the seal.
- Retest after repairs: a quiet tank is only reassuring after it passes the waiting test.
When a New Toilet Saves More Than a Repair
If the toilet is old, cracked, unreliable, or still leaks after correct internal parts are replaced, replacement may be a better long-term option. EPA WaterSense says toilets are the main source of water use in the home, accounting for nearly 30 percent of average indoor household consumption, and that older inefficient toilets may use as much as 6 gallons per flush https://www.epa.gov/watersense/residential-toilets. Current WaterSense-labeled toilets use 1.28 gallons per flush or less while meeting performance criteria.
The savings depend on what you are replacing. EPA's WaterSense calculator assumptions use about 5 gallons per flush for toilets installed before 1980, about 3.5 gallons for toilets installed between 1980 and 1994, and about 1.6 gallons for toilets installed after 1994; the calculator also assumes an average of 5.05 flushes per person per day https://www.epa.gov/watersense/how-watersense-calculator-works. Those numbers explain why replacing a very old fixture can matter more than tinkering with the tank.
How to Think About Dual-Flush Toilets
Dual-flush toilets can save water when people use the reduced-flush option correctly, but the toilet still has to be maintained like any other fixture. EPA's home maintenance page advises making sure everyone in the home knows how and when to use the full-flush mode versus the reduced-flush mode https://www.epa.gov/watersense/home-maintenance. A confusing handle or button can lead to unnecessary full flushes, repeated flushes, or complaints that the toilet is not working well.
If you are comparing replacement models, look for a WaterSense label and read the manufacturer's installation requirements. A good toilet is not just a low number on a box. WaterSense-labeled products are independently certified for both water efficiency and performance, and EPA notes that labeled toilets use 1.28 gallons per flush or less while using 20 percent less water than the current federal standard of 1.6 gallons per flush https://www.epa.gov/watersense/residential-toilets. In plain terms: saving water should not require accepting poor flushing.
What Not to Put in the Tank
Avoid loose bricks, stones, bags, jars, improvised weights, and unapproved conversion pieces. A loose object can shift, block the flapper, interfere with the float, scrape tank surfaces, or change the flush volume in a way the bowl was not designed to handle. The old brick trick is especially poor because a brick can crumble and leave grit inside the tank. If the goal is to stop a leak, a proper seal repair is cleaner. If the goal is to reduce flush volume, a WaterSense-labeled replacement is a more reliable path than guessing inside the tank.
Also be cautious about adjusting the chain to make the flapper close sooner. Too short a flush can leave the bowl uncleared and invite a second flush. Too long a chain can keep the handle from lifting the flapper fully. Too tight a chain can keep the flapper from sealing. The sweet spot is simple: the handle should lift the valve without strain, and the flapper should settle flat after each flush.
The Takeaway
The plumber's water-saving trick is less dramatic than the online version, but it works better: confirm the leak, replace the correct worn seal, set the tank level below the overflow tube, and avoid tank shortcuts that disturb flush performance. If the toilet is very old or repeatedly unreliable, replacement with a WaterSense-labeled model may save more water than another small repair. Either way, the winning move is measured, not improvised. Test first, repair what failed, and retest before calling the job done.
Wrap-Up
To save toilet water, start with the parts that control unwanted flow. A dye test reveals silent leaks, the flapper or seal is the first part to inspect, and the tank water level should stop below the overflow tube. Avoid loose weights or displacement objects in the tank because they can interfere with performance. For older fixtures, a WaterSense-labeled toilet may offer the larger long-term saving.
Frequently Asked Questions
- → Does putting a weight on the flapper save toilet water?
It is not the best first fix. A weight can change the way the flapper lifts and closes, and it may create weak flushing or another leak. Test for a leak first, then replace the correct flapper or seal if the test shows water moving into the bowl.
- → How do I know if my toilet is wasting water silently?
Put a few drops of food coloring or a dye tablet in the tank and wait about 10 minutes without flushing. If color appears in the bowl, the tank is leaking into the bowl. EPA WaterSense recommends flushing after the test to avoid staining https://www.epa.gov/watersense/fix-leak-week.
- → How often should a toilet flapper be replaced?
EPA WaterSense says flappers should be checked periodically and replaced at least every five years to maintain a good seal. Replace sooner if the rubber is warped, brittle, slimy, cracked, or if a dye test shows a leak.
- → Where should the water level be in the toilet tank?
Use the tank's marked waterline if it has one. If not, EPA guidance says the refill water level should be set one inch below the top of the overflow tube. If water runs into the overflow tube, lower the float or replace a faulty fill valve.
- → When is replacing the whole toilet worth it?
Consider replacement when the fixture is very old, cracks are present, parts no longer seal reliably, or repeated repairs do not stop leaks. EPA WaterSense notes that older inefficient toilets can use much more water per flush than labeled models, which use 1.28 gallons per flush or less.