 Save
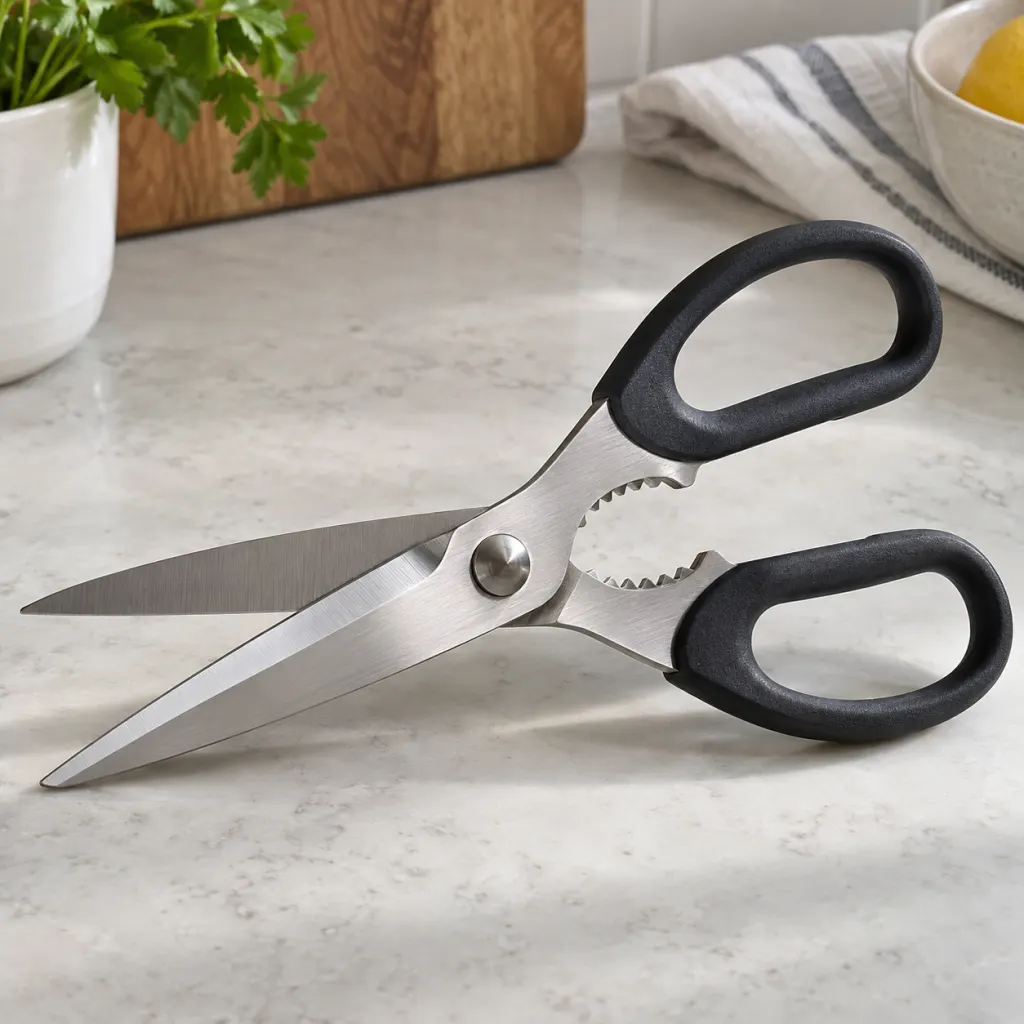
The serrated part of kitchen scissors is usually a built-in gripper: a small toothed area near the handles or pivot that helps hold round, firm, or slippery items while you squeeze the handles. On different models, that same area may be described as a jar grip, cap opener, nutcracker, shell cracker, or general utility notch. It is not a second cutting blade. Think of it as a compact clamp that borrows the leverage of the scissors. Kitchen scissors still work by two blades moving past each other at a pivot, a basic scissor form described in museum terminology from the University of Cambridge's Fitzwilliam Museum collection data: https://data.fitzmuseum.cam.ac.uk/id/terminology/term-79863. The serrated section adds another job to that familiar tool.
The Short Answer: It Is a Gripping Notch
On most multipurpose kitchen scissors, the serrated part is there to grip, crack, twist, or hold. When the scissors are partly open, the two toothed surfaces face each other. When you close the handles around a small firm object, the teeth bite lightly into the surface or press against it so it does not slide away. That makes the section useful for tasks that are awkward with the cutting blades alone: loosening a stubborn twist cap, getting traction on a small jar lid, cracking a small nut shell, gripping a shellfish shell, or holding a tough herb stem while trimming. The exact purpose depends on the model, because manufacturers place the teeth in different spots and give them different shapes.
Where to Find It on the Scissors
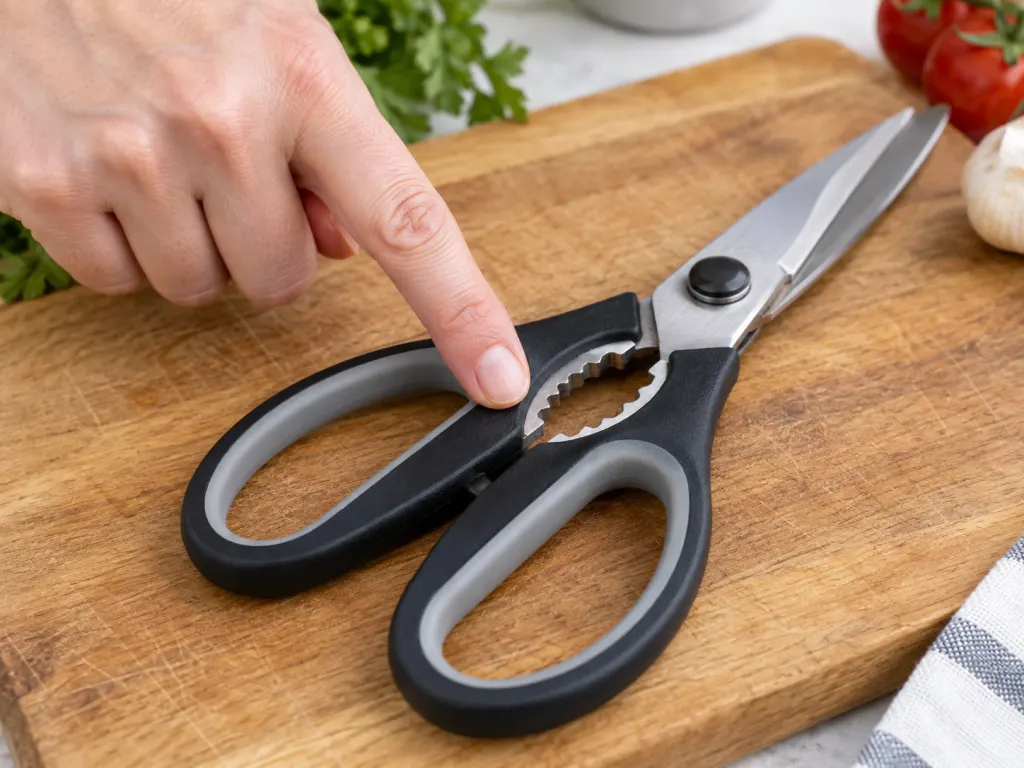
Look between the handles, just behind the pivot, or along the inner side of the handle frame. The feature is usually a pair of curved or crescent-shaped toothed arcs that meet when the handles close. It may also look like a jagged oval cutout, a small toothed jaw, or a recessed metal patch set into the handles. If the teeth line up against each other, the feature is meant to grip. If you see a notch and a hook on the outside of one handle, that may be a bottle-cap opener instead. If the toothed part is on the cutting edge of one blade, that is a different feature: a micro-serrated blade edge meant to reduce slipping while cutting food, twine, or packaging.
Why the Teeth Work Better Than Smooth Metal
The useful part is friction. A smooth handle can slide on a round lid or shell, especially if the item is damp. Teeth create many small contact points. They also concentrate pressure in a narrow area, so the object is held more firmly with less hand effort than a smooth surface would provide. The pivot matters too. Scissors are a lever system: the handles move farther than the short toothed area near the pivot, which helps convert hand movement into holding pressure. That is why the serrated section is usually close to the hinge rather than at the far end of the handles.
The feature is most useful when the object fits fully inside the toothed area. A small cap, a lobster or crab shell segment, a walnut-size shell, or a narrow stem bundle can sit between the teeth. A wide jar lid may not fit, even if the feature is marketed as a jar grip. If the teeth only catch one edge and the object rocks sideways, switch tools. Forcing the scissors can bend the handles, stress the pivot, or leave you with less control than a purpose-built opener.
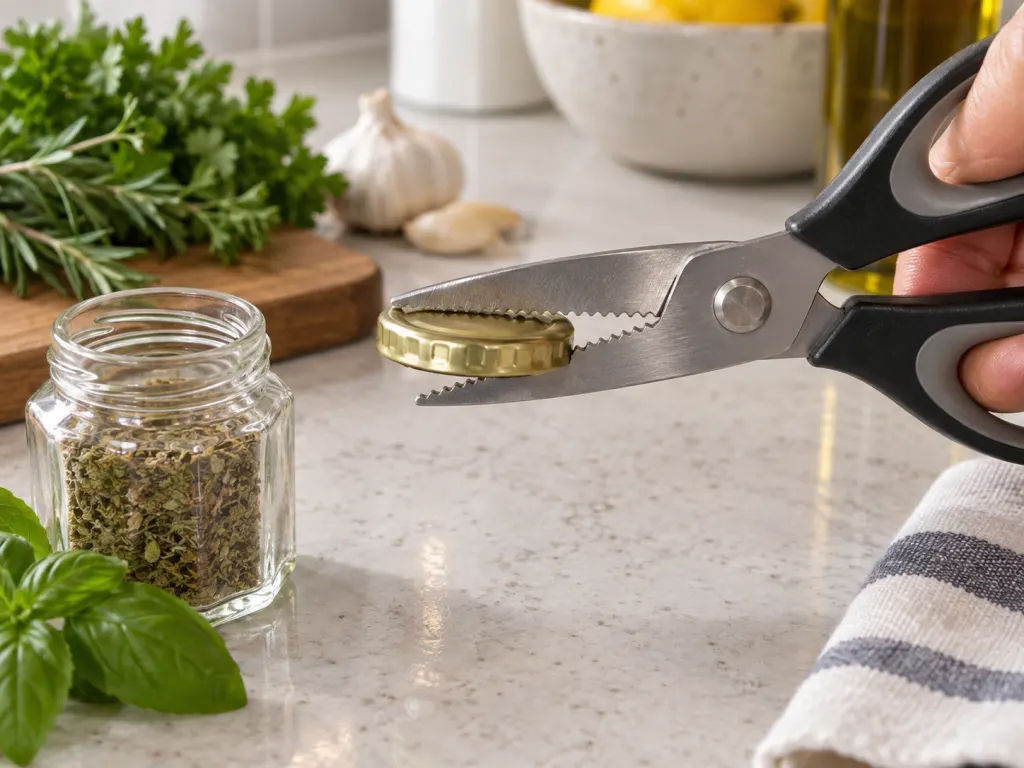
Common Uses for the Serrated Part
The serrated area is best understood as a small kitchen clamp, not a universal opener. It can help with several everyday jobs, but only when the size and shape match the tool. Try it gently first, then stop if the item slips or the scissors twist in your hand.
- Twist caps: The teeth can add traction on small screw caps that are too slick for bare fingers.
- Jar lids: Some designs can grip the edge of a small lid, though large lids often need a dedicated jar opener.
- Nut shells: Heavier shears may crack small shells when the teeth are shaped like opposing jaws.
- Shellfish shells: The teeth can hold curved shell pieces while the blades trim or split nearby sections.
- Herb stems: The notch can steady woody stems before trimming, especially when the blades are sharp enough for the job.
- Small round foods: It can hold a round item briefly while you reposition, but the cutting blades should still do the cutting.
What It Is Not For
The serrated part is not meant to replace pliers, a full-size nutcracker, a bottle opener, poultry shears, or a heavy workshop tool. It is also not a sharpening notch. Rubbing a blade against those teeth will not properly sharpen the scissors and may damage the edge. It is not a decorative mystery part, but it is also not proof that your scissors can handle every hard kitchen task. If the scissors are lightweight, have plastic handles around a small metal insert, or feel loose at the pivot, keep the serrated feature for gentle gripping rather than cracking.
How to Use It Without Overworking the Tool
Start with clean, dry scissors and a stable surface. Open the handles just enough to place the item between the toothed sections. Keep the object close to the pivot rather than near the tips of the blades. Close the handles slowly until the teeth grip. For a cap or lid, twist the object while keeping the scissors steady; for a shell or nut, apply gradual pressure rather than a fast squeeze. If the object shifts, slips, or requires a hard squeeze, stop and choose a more suitable opener. A good rule is simple: the tool should feel controlled, not strained.
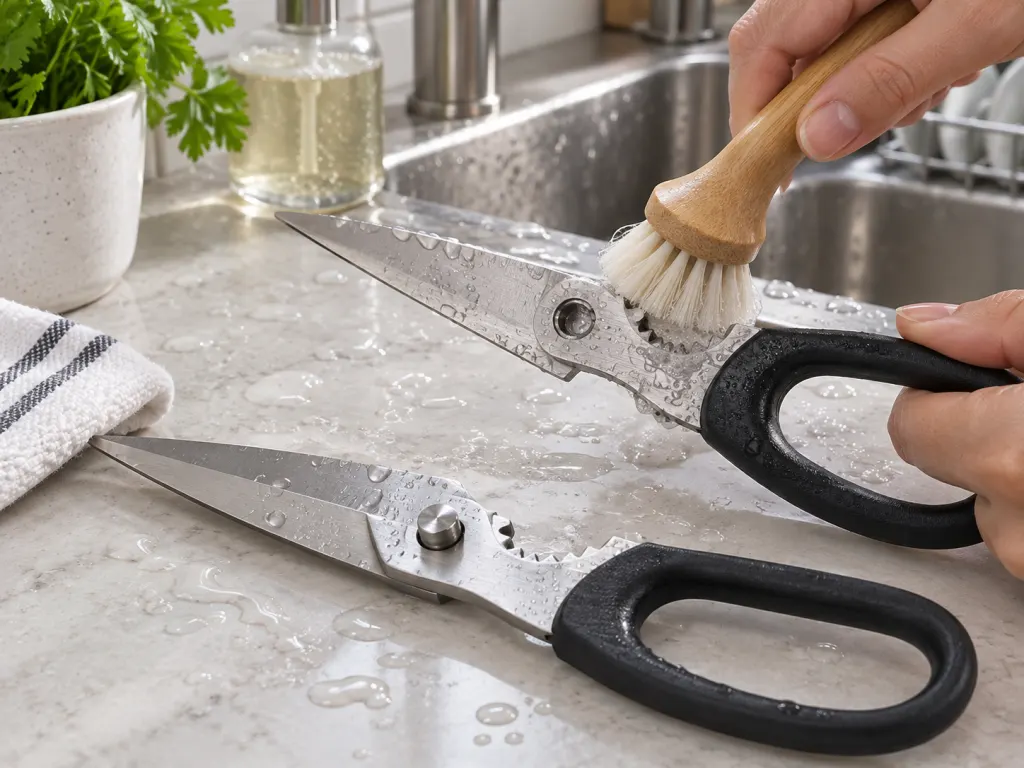
Clean the Serrated Area Like a Food-Contact Detail
The toothed section can trap tiny bits of shell, herb, packaging glue, or food residue, so it deserves more attention than the smooth handle. FoodSafety.gov advises washing utensils and surfaces with hot, soapy water after use, especially after contact with raw meat, poultry, seafood, or eggs: https://www.foodsafety.gov/keep-food-safe/4-steps-to-food-safety. The same page emphasizes keeping raw and cooked foods separate, which is a useful habit for scissors that move between packages, herbs, and protein prep. For the handwashing part of the routine, CDC guidance says to scrub with soap for at least 20 seconds: https://www.cdc.gov/clean-hands/about/.
If your kitchen scissors come apart, separate the blades before washing so you can reach the pivot and the teeth. Use a dish brush to clear the serrations, rinse well, and dry immediately. If the scissors do not separate, open and close them under running water while brushing the toothed area carefully. Dry the hinge and the serrated notch before putting the scissors away. Moisture left in the joint can make the action feel rough over time, especially on lower-cost shears or models with mixed metal and plastic parts.
Why Removable and Smooth Designs Are Easier to Maintain
Food-contact tools are easier to keep in good condition when their surfaces are durable, smooth, and accessible. FDA food equipment guidance describes food-contact surfaces as needing to be corrosion resistant, durable, easily cleanable, relatively nonabsorbent, nontoxic, smooth, and free of open seams: https://www.fda.gov/interstate-carriers-and-support-facilities-guidelines. The FDA also publishes the Food Code as a model for food safety rules used by regulators: https://www.fda.gov/food/retail-food-protection/fda-food-code. For a home cook, the practical takeaway is straightforward: choose scissors with fewer unreachable crevices, clean the pivot well, and replace a pair that becomes loose, rusty, cracked, or hard to wash.
How It Differs From Micro-Serrated Blades
The serrated notch and a micro-serrated blade edge are easy to confuse because both use teeth. They do different jobs. A micro-serrated blade has tiny teeth along the cutting edge. Those teeth help the blade hold slippery foods while the opposite blade completes the cut. The serrated notch, by contrast, is usually away from the blade edge and works like a gripper. It holds an object between two toothed surfaces. If your scissors have both features, use the blade teeth for cutting and the handle teeth for gripping, twisting, or cracking small items that fit the notch.
When a Different Tool Is the Better Choice
Use a dedicated tool when the task is large, hard, or valuable enough that control matters more than convenience. A real jar opener gives more contact around a wide lid. A nutcracker is better for a bowl of nuts because it is shaped for repeated pressure. Seafood crackers are better for thick shells. A bottle opener is faster and cleaner for crown caps. Pliers belong outside the food-prep drawer unless they are made and kept for kitchen use only. Kitchen scissors are wonderfully versatile, but versatility is not the same as unlimited strength.
What to Look For When Buying Kitchen Scissors
If you want the serrated part to be genuinely useful, inspect the whole pair before buying. The teeth should line up neatly when the handles close. The pivot should feel firm, not wobbly. The handles should give enough room for your grip without forcing your fingers into an awkward angle. Removable blades are a major plus for cleaning. Stainless steel is common because it resists corrosion in ordinary kitchen use, but construction quality still varies. A dishwasher-safe claim is convenient, yet hand drying is still wise because hinges, screws, and handle joints can hold water.
Bottom Line
The serrated part of kitchen scissors is one of those small design details that makes more sense once you see it as a gripper. It gives the scissors a second function beyond cutting by creating friction around small round or firm items. Use it gently, match it to tasks that fit the notch, and keep it clean. If your scissors slip, flex, or require too much force, the smart move is not to squeeze harder. It is to reach for the dedicated tool that gives you better control.
Wrap-Up
The serrated section on kitchen scissors is usually a built-in gripping jaw near the pivot or handles. It can help twist small caps, grip lid edges, crack light shells, steady shellfish, or hold firm stems, depending on the model. It is not a sharpening tool or a substitute for every opener. Use it only when the object fits securely, clean the teeth and pivot well afterward, and choose removable, easy-to-clean scissors when possible.
Frequently Asked Questions
- → Is the serrated part of kitchen scissors a nutcracker?
Sometimes. On sturdy kitchen shears with opposing toothed jaws, the serrated part may crack small nut shells. Lightweight scissors may only be intended for gripping caps or lids, so use gentle pressure and stop if the tool flexes.
- → Can I use the serrated notch to open jars?
You can try it on small lids if the teeth fit securely around the edge. For wide or very tight lids, a dedicated jar opener gives more contact and better control.
- → Is the serrated section for sharpening the blades?
No. The toothed section is generally for gripping, twisting, or light cracking. It will not properly sharpen the cutting blades and may roughen the edge if used that way.
- → Why do some kitchen scissors have no serrated part?
Not every pair is designed as a multipurpose tool. Some kitchen scissors focus on cutting only, while others add features such as a cap opener, jar grip, shell cracker, or removable blades.
- → How should I clean the serrated area?
Wash it with hot, soapy water after use, brush between the teeth, rinse well, and dry the pivot and notch before storage. If the scissors separate, take them apart first so the hinge area is easier to reach.